
Whistle While You Work: 5 iTunes Tips and Tricks You Must Use
Most people in IT work WAY too much. We can make this time more tolerable by listenting to music or a favorite podcast. Most people will agree spending most of your life online can’t be healthy, see me as a prime example of internet health. In spending all of your time online you do pick up vast amounts of seemingly useless information along with minute chunks of data that might be useful. I figure I do have some minute tidbits of useful data that would be of value to share with the rest of the internet and since I am in a kind mood I will share them! A lot of users out there like me have an iOS device and because of this you’re forced into (some folks begrudgingly) using iTunes for your device. At times iTunes can function poorly, there are a lot of Windows users out there who will testify to several frustrating moments in day to day usage. Mac users I am not sure what your complaints might be, as I don’t have a Mac so I don’t get to enjoy your frustrations, just Windows for me. In my scouring and reading online I have come across some tips, tricks, hacks, whatever you want to call them that people may not know of that will help improve your user experience of iTunes. Perhaps some of these tips I am sharing will save you from the future heart attack, stroke, or psychotic break from iTunes related stress. Glad I can help, send me money if you’d like.
Tip #1 – Conversion Timing
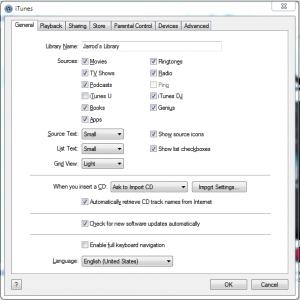
Some users believe that keeping the preferences window open during a conversion with iTunes speeds up that process. I do not know if this does in fact help the conversion speed, but it’s worth a shot for those out there to test. No harm no foul and hopefully quicker conversions. Simply click on Edit and click on Preferences to open the window and keep that open while you’re ripping your Justin Beiber CD’s that I know you all have. Soon you’ll have Baby with you wherever you go, aren’t you happy!
Tip #2 -Find That App
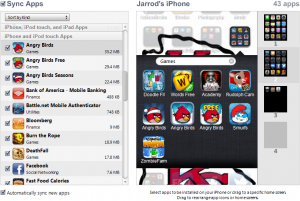
If you’re like me and your iOS device is filled to the brim with apps you use folders to organize them. When you’re device is attached to your PC and you click on the App tab you see your list of synced apps, but you may not recall what folder that App is residing. Well you can double click on the app name in the column and it will display the location and folder on the right side of the screen. I know this isn’t the most useful thing around but it is a pretty cool feature I had no idea about and I thought I would share it.
Tip #3 – Syncing Your iTunes Library Across Multiple Computers Using Dropbox
This is one of the more complicated pieces, but it is also one of the most useful and awesome tips. Dropbox is one of my favorite things out there, having a place you can sync data to on all of your computers is so functional and useful it is crazy. Using it to sync your iTunes library is epically great and a great idea. You’ll need a Dropbox account of course and to have it set up on all the PC’s you’ll be syncing. This presents a problem in the amount of data your library will take up. If you’re like me you have ten times more data than that free 2gb of storage that Dropbox provides for free. Once you have that set it’s a pretty simple process, kind of slow, but simple. First thing is to copy your entire library to your Dropbox, this will take a lot of time, there’s no way around that. Make sure your iTunes is shut down on all the PC’s you will be syncing to. Before you open iTunes hold down the shift key, this will allow you to choose a new library to sync. Select your Dropbox synced location and let it finish setting up before moving on to another PC. You will only be able to have one copy of iTunes open at a time connected to the iTunes library synced on Dropbox. It’s a limitation on how iTunes and Dropbox will work together. This also keeps your data safe in the event you have a hard drive take a dive.
Tip #4 – Another Way To Speed Up iTunes
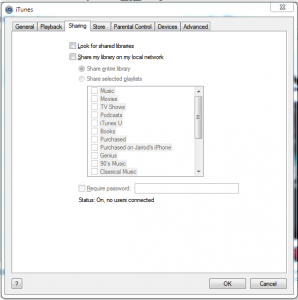
If you’ve followed the Dropbox sync method above or if you have a very specific setup on your local network like I do there are some settings in iTunes you can turn off that will help it run a bit faster and keep it from looking to the network for other shared libraries. Click on Edit then click on Preferences and go to the Sharing tab. You can remove the check on the two options listed to keep iTunes from messing with the network which will help it load faster and should be a smoother operation all around.
Tip #5 – Do Not Need Another Social Network!
I do not need another social network to keep up on, I’ve got enough. I really am not familiar with Ping enough to completely judge it. I just don’t feel any need to participate in it as no one I know does either. So if I don’t want it, why not disable it? That’s exactly what I did. If you click on Edit, and then on Preferences you can click on the Parental Control tab and disable Ping and other features there.

I hope you find these tips useful, I know using them I think I have a better experience with iTunes in Windows. And as long as I think that (placebo effect probably) I am a-OK!