Certification: CCT
Certification Full Name: Certified Cybersecurity Technician
Certification Provider: ECCouncil
Exam Code: 212-82
Exam Name: Certified Cybersecurity Technician
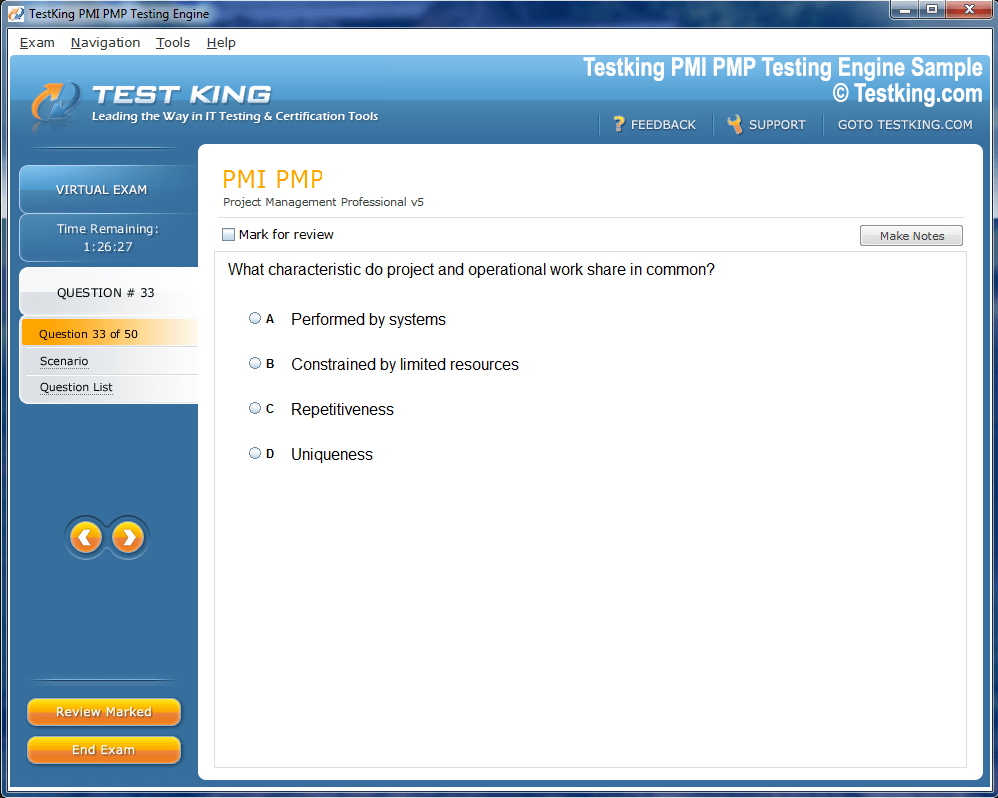
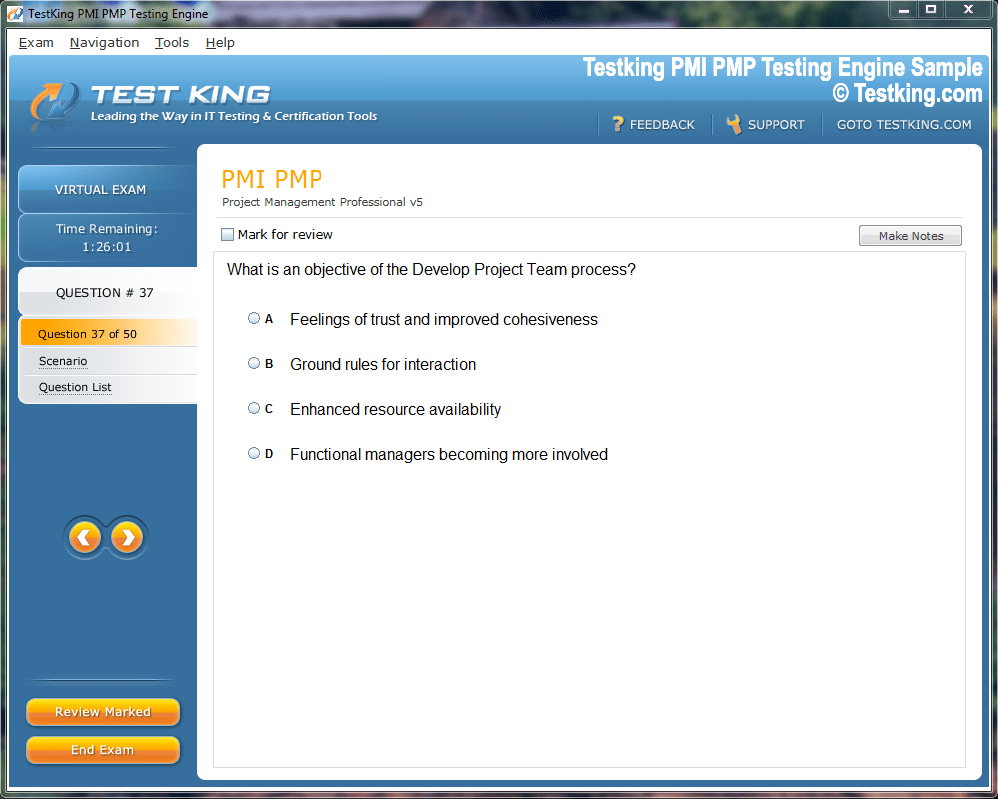
Product Screenshots


nop-1e =1
Front-End CCT Management: Creating Forms for User Dashboard Item Insertion and Modification
Managing Custom Content Type items directly from the front-end interface provides tremendous flexibility for website administrators and end-users alike. This comprehensive methodology demonstrates the construction of sophisticated forms utilizing JetFormBuilder, enabling seamless insertion and modification of CCT items through various front-end locations including account dashboards, modal windows, and dedicated singular pages.
The implementation process requires specific technical prerequisites to ensure smooth functionality. Your WordPress installation must include either the complimentary version of Elementor or the native Block editor (commonly referred to as Gutenberg). Additionally, the JetEngine plugin necessitates proper installation and activation, with a Custom Content Type already established and an account page properly configured. Finally, the JetFormBuilder plugin must be both installed and activated within your WordPress environment.
Establishing a Form for CCT Item Creation
The initial phase involves constructing a form specifically designed for generating new CCT entries. Navigate through your WordPress administrative interface to access JetEngine, then proceed to the Custom Content Types section. Locate your desired CCT (in this demonstration, we're utilizing a "Webinars" content type) and initiate the modification process by selecting the designated editing action.
An important technical consideration warrants attention at this juncture. Should your configuration include custom fields designated as "Date" or "Datetime" within the CCT structure, you must activate the timestamp preservation functionality within their respective configuration panels. This ensures proper data storage and retrieval mechanisms.
Within the CCT modification interface, locate the Actions panel positioned on the right-hand side of the screen. Here, you'll discover an option labeled for form creation. Activating this functionality triggers an automatic redirection to the newly generated form's editing environment.
The system automatically generates a form containing field elements that mirror the CCT's custom meta field structure. Each field inherits identical labels, nomenclature, and data types as their corresponding CCT counterparts. In our demonstration scenario, the form encompasses various field types including a text input for the webinar designation, a textarea component for detailed descriptions, a media upload interface for imagery, a datetime selector for scheduling purposes, and another text field dedicated to registration hyperlinks. Furthermore, an action button facilitates form submission.
When your form architecture incorporates Media Field blocks, additional configuration becomes necessary. Access the Block settings panel and navigate to the Field tab. Within this interface, enable the attachment insertion functionality and configure the field value parameter to align with your "Media" meta field specifications. For instance, if your meta field utilizes "Media ID" as its value format, you must establish "Attachment ID" as the corresponding field value within the form. This synchronization proves critical, as its absence prevents users from successfully uploading files through the form interface. Additionally, access control settings can be refined at this stage.
Subsequently, examine the Post Submit Actions section located within the JetForm configuration tab. The system automatically implements an "Insert/Update Custom Content Type Item" action as the default behavior. To review or modify these parameters, hover over the action entry and select the editing icon.
The action configuration dialogue presents several crucial settings. The Content Type dropdown displays your recently created CCT as the pre-selected option. The Item Status field allows you to determine whether submitted entries receive "Draft" or "Publish" designation immediately upon submission. The Fields Map section illustrates the correlation between form fields and their corresponding CCT meta fields, ensuring data flows correctly when users complete and submit the form. The Default Settings area provides opportunities to establish predefined values for CCT default fields.
Any modifications to these action parameters require confirmation through the update mechanism. Once satisfied with your configuration, preserve the form using the save functionality.
Your form now stands ready for deployment across any page or template within your website architecture. Implementation occurs through the JetForm widget or block component. For detailed deployment instructions, consult the comprehensive guide regarding front-end form display methodologies.
Constructing a Form for CCT Item Modification Within Account Pages
Enabling users to modify CCT items directly from listing displays requires a specialized form capable of retrieving data from specific CCT entries, thereby allowing users to review and alter existing content.
Commence by establishing a new form structure. To expedite this process, access the WordPress administrative dashboard, navigate to JetFormBuilder, and locate the Forms tab. Utilize the duplication functionality on your previously created form by activating the corresponding action button.
Modify the form title to reflect its editing purpose, then introduce a Hidden Field block to the form structure. Configure this field's value parameter as "URL Query Variable" and establish "_post_id" as the query variable identifier.
Progress to the Post Submit Action configuration within the JetForm section. Hover over the "Insert/Update Custom Content Type Item" action, activate the editing icon, and establish a connection between the Hidden Field and "Item ID (will update the item)" within the Fields Map section. Confirm these modifications through the update button.
The final configuration step involves establishing preset functionality to ensure form fields populate with existing data. Expand the Preset tab within the JetForm section and activate the enable toggle. Designate "Custom Content Type" as the source parameter. The item ID retrieval method should match the Hidden Field configuration, specifically "URL Query Variable," with "_post_id" specified as the query variable name.
Establish field mapping connections between all CCT meta fields and their corresponding form field counterparts. For the Hidden Field specifically, select the "Item ID" option from available choices.
Upon completing form customization, utilize the save functionality to preserve your configuration.
Positioning the Form on Account Subpage Template
With form construction complete, attention shifts to creating an appropriate Account subpage template. Navigate through the WordPress Dashboard to access JetEngine, then proceed to the Profile Builder tab. Open the Account Page section and activate the subpage addition functionality.
Establish both title and slug parameters for this template. Consider activating the menu concealment toggle to hide this page from the Profile Menu navigation structure, ensuring accessibility exclusively through redirect links.
Activate the template creation link positioned beneath the Template link field to trigger a configuration dialogue. Input the template designation and specify the template type, which can be either "Listing Item" or "Elementor Template." Should you select "Listing Item," an additional selection regarding listing view becomes necessary, choosing between "Elementor" or "Blocks (Gutenberg)." Confirm your selections through the creation button, which redirects you to the template editing interface in a fresh browser tab.
Within the template editing environment, incorporate the JetForm widget or block component, select your newly constructed form from the available options, and publish the template to make it active.
Developing a Listing Template for CCT Items
The next phase requires constructing a listing template that incorporates navigational links to the CCT item editing page. Access the WordPress Dashboard, proceed to JetEngine, and locate the Listings or Components section. Initiate the item addition process.
Specify "Custom Content Type" as the listing source parameter, select your CCT designation from the content type dropdown, input a descriptive listing item name, and choose your preferred listing view format. Confirm these selections through the creation button.
Incorporate all necessary Dynamic Widgets and Blocks to properly display CCT item data. For comprehensive guidance on this process, refer to the dedicated tutorial covering Custom Content Type listing template creation.
Subsequently, position a Dynamic Link component, designating "Profile Page" as its source parameter, and select your recently constructed template as the target Profile Page. Activate the query arguments functionality, which reveals a textarea containing the following text structure:
The asterisk-post-asterisk-id equals percentage-current-underscore-id-percentage format.
After completing listing item customization, utilize the publish functionality to make your configuration active.
Integrating the Listing Grid into Account Template
The concluding step involves establishing a new Account subpage template housing the listing you've just created. Navigate through the WordPress Dashboard to JetEngine, access the Profile Builder tab, open the Account Page section, and activate the subpage addition functionality.
Configure both title and slug parameters, then activate the template creation link. Within the profile template creation dialogue, input the template designation and specify the template type. Confirm through the creation button.
Position the Listing Grid component within the template, select your created listing from available options, and publish the template to activate it.
Examine your implementation by navigating to the Account page within the front-end interface. Open the subpage containing the listing display, then activate the modification button.
Upon activating the modification button, the interface redirects to the page housing the CCT item editing form with pre-populated data fields.
Establishing Form for CCT Item Modification Within Modal Windows
Now, let's explore the methodology for incorporating the CCT item editing form within a modal window interface.
An important prerequisite involves having the JetPopup plugin properly installed and activated within your WordPress environment.
Initially, construct a new form or duplicate the original CCT item creation form. Rename this form appropriately, then place a Hidden Field while leaving the field value parameter unselected.
Access the Block settings tab within the right panel, scroll downward to locate the default value field, and activate the database icon. Select "Custom Content Type" as the source parameter, choose "Current post" from the item ID retrieval field, and specify "Item ID" as the CCT value. Confirm these selections through the update mechanism.
Within the Insert/Update Custom Content Type action editing window, establish a connection between the Hidden Field and the "Item ID (will update the item)" option within the Fields Map section, then confirm through the update button.
Expand the Preset tab within the JetForm section and activate the enable toggle. Select "Custom Content Type" as the source parameter and "Current post" for the item ID retrieval field. As with previous configurations, establish mapping connections between form fields and CCT meta fields. Finally, preserve your modifications.
Form Placement Within Modal Window
Preserve your changes and construct a dynamic modal window to house this form. Add the JetForm component to the modal window and select the form from available options. Activate the settings icon to access modal window configuration.
Within the Settings tab, enable both Ajax content loading and force loading options, then publish the modal window to make it active.
Access the listing template for CCT items and incorporate a Button component (either from Elementor or the JetElements plugin). Within the Advanced settings tab of this widget, expand the JetPopup tab, select your required modal window from available options, specify "Click On Widget" as the trigger type, and activate the Jet Engine Listing popup functionality.Preserve your modifications and incorporate the Listing Grid containing this listing template on your desired page. In this demonstration, we're again utilizing the Account page.
Navigate to the Account page within the front-end interface, access the subpage containing the listing display, and activate the modification button. This action triggers the modal window containing the pre-filled CCT item editing form.
Establishing Form for CCT Item Modification on Singular Pages
For singular page implementation, you can utilize the modal window form or construct a new form with identical configuration parameters.
Access the singular CCT template, position a JetForm component, and select your recently constructed form. Preserve your modifications.
Proceed to the CCT's singular page within the front-end interface. The form displays with pre-populated data as intended. You can modify CCT details and submit the form to verify functionality.
Advanced Form Customization Techniques
Expanding beyond basic form functionality opens numerous possibilities for enhancing user experience and streamlining content management workflows. Understanding these advanced techniques empowers developers to create sophisticated, user-friendly interfaces that cater to specific business requirements and operational demands.
Conditional logic represents a powerful mechanism for creating dynamic forms that adapt based on user input. This functionality allows certain fields to appear or disappear depending on values entered in previous fields, creating a more intuitive and streamlined user experience.
Within JetFormBuilder's conditional logic framework, you can establish rules governing field visibility, requirement status, and even entire form sections. For instance, when creating a webinar registration form, you might implement conditional logic that displays additional fields for corporate registrations but hides them for individual attendees.
The configuration process involves accessing the field settings panel and locating the conditional logic section. Here, you establish trigger conditions based on other field values. The system supports multiple condition types including equals, not equals, greater than, less than, contains, and various other comparison operators.
Multiple conditions can be combined using AND or OR logic operators, enabling complex validation scenarios. This proves particularly valuable when dealing with forms containing numerous interdependent fields where certain information becomes relevant only under specific circumstances.
Establishing Custom Validation Rules
While JetFormBuilder provides standard validation for common field types, custom scenarios often demand specialized validation logic. Implementing custom validation ensures data integrity and prevents users from submitting incomplete or incorrectly formatted information.
Custom validation rules can enforce specific formats for telephone numbers, postal codes, identification numbers, or any other data requiring standardized formatting. Regular expressions provide powerful pattern-matching capabilities for validating complex data structures.
Additionally, cross-field validation enables checking relationships between multiple fields. For example, ensuring an end date occurs after a start date, or verifying that alternative contact information exists when primary methods are unavailable.
Incorporating Multi-Step Form Architecture
Complex forms containing numerous fields can overwhelm users, leading to abandonment and decreased completion rates. Multi-step form architecture addresses this challenge by segmenting lengthy forms into manageable sections, improving user experience and increasing submission rates.
JetFormBuilder facilitates multi-step form creation through page break functionality. Each section represents a logical grouping of related fields, allowing users to focus on one aspect of the form at a time. Progress indicators provide visual feedback regarding completion status, encouraging users to continue through all steps.
Navigation buttons enable movement between form steps, with the system automatically saving progress to prevent data loss. Validation can occur at each step, ensuring users correct errors immediately rather than discovering multiple issues upon final submission.
Integrating File Upload Capabilities
Many scenarios require users to submit supporting documents, images, or other files alongside form data. Properly configured file upload functionality ensures secure, efficient file handling while maintaining system performance.
File upload fields require careful configuration regarding accepted file types, maximum file sizes, and storage locations. Implementing appropriate restrictions prevents malicious file uploads and ensures storage systems aren't overwhelmed by excessively large files.
Security considerations prove paramount when handling user-uploaded files. Implementing virus scanning, file type verification, and secure storage practices protects both your system and other users from potential threats.
Implementing Automated Email Notifications
Email notifications serve multiple purposes within form-based workflows, keeping relevant parties informed about submissions, status changes, and required actions. Properly configured email notifications enhance communication and ensure timely responses to user submissions.
JetFormBuilder's email notification system supports multiple notification types, including confirmations sent to form submitters and alerts sent to administrators or specific team members. Each notification can be customized with dynamic content derived from form submissions.
Template variables allow inserting specific form field values into email content, creating personalized, informative messages. Conditional email notifications enable sending different messages based on form data, ensuring recipients receive relevant information.
Establishing Redirect Functionality
After form submission, redirecting users to appropriate pages enhances user experience and guides them toward next steps. Redirect functionality can direct users to confirmation pages, account dashboards, or external resources based on submission context.
Static redirects direct all users to the same destination regardless of submission content. Dynamic redirects enable different destinations based on form data, providing personalized experiences aligned with user inputs or selections.
Redirect URLs can incorporate query parameters derived from form submissions, passing data to destination pages for further processing or display. This proves valuable when integrating forms with external systems or multi-step processes.
Security Considerations and Best Practices
Security forms the foundation of any robust form implementation, particularly when handling sensitive user data or enabling content creation capabilities. Implementing comprehensive security measures protects both your system and your users from various threats and vulnerabilities.
User Authentication and Authorization
Before allowing CCT item creation or modification, verifying user identity and authorization proves essential. WordPress's built-in authentication system provides the foundation, but additional layers enhance security.
Role-based access control enables restricting form access to specific user roles. For instance, you might allow all authenticated users to create CCT items but restrict editing capabilities to content authors or administrators.
Capability checking ensures users possess specific permissions before accessing forms or performing actions. This granular approach provides precise control over who can perform various operations.
Input Sanitization and Validation
Every piece of data entered through forms requires sanitization and validation before storage. Sanitization removes potentially dangerous content, while validation ensures data meets expected formats and requirements.
Server-side validation proves essential even when client-side validation exists, as malicious users can bypass client-side checks. All data must be validated on the server to ensure integrity and security.
SQL injection prevention requires using prepared statements and parameterized queries when interacting with databases. Never directly concatenate user input into database queries, as this creates significant security vulnerabilities.
Cross-site scripting (XSS) prevention necessitates encoding output when displaying user-generated content. This prevents malicious scripts from executing in other users' browsers.
Implementing Rate Limiting
Rate limiting is a crucial strategy for safeguarding online platforms from misuse, spam, and automated abuse. It functions by restricting the number of form submissions or requests an individual user or IP address can make within a predefined time window. Without rate limiting, websites are highly susceptible to a range of security threats, including brute-force login attempts, denial-of-service (DoS) attacks, and other forms of automated exploitation. By imposing submission limits, organizations can ensure the system remains accessible for legitimate users while thwarting malicious actors.
Configuring rate limiting effectively requires careful consideration of multiple parameters. First, the maximum number of allowed submissions within a given timeframe must be determined based on typical user behavior and the sensitivity of the form. For instance, a login form may require stricter limits than a contact form. Secondly, the lockout period that follows when the maximum limit is exceeded should be clearly defined. This period should be long enough to deter abuse but not so long as to frustrate genuine users. Third, administrators must decide whether to apply restrictions on a per-user basis, per IP address, or both. Combining these strategies enhances security by accounting for multiple vectors of attack while still maintaining user accessibility.
An advanced approach known as graduated rate limiting introduces dynamic restrictions that intensify as suspicious behavior escalates. Rather than immediately blocking a user or IP address, graduated rate limiting increases restrictions incrementally. For example, a user making repeated failed login attempts may initially face minimal delays between requests. If the suspicious activity persists, the system may lengthen the delay progressively, eventually leading to temporary suspension if needed. This method strikes a balance between user convenience and robust protection, ensuring that legitimate users are not unduly penalized while attackers face increasingly stringent obstacles.
Integrating rate limiting is also a vital component of maintaining compliance with privacy regulations and cybersecurity best practices. Many regulatory frameworks require websites to implement mechanisms that prevent automated abuse and unauthorized access to sensitive data. By enforcing rate limits, organizations demonstrate proactive security measures that help protect user information and build trust with their audience.
Cross-Site Request Forgery (CSRF) Protection
Cross-Site Request Forgery, commonly referred to as CSRF, is a type of attack in which malicious actors trick authenticated users into submitting unintended actions on web applications. These attacks exploit the trust a website places in a user's browser, often resulting in unauthorized actions such as changing account settings, making purchases, or even transferring funds. The consequences of CSRF attacks can be severe, particularly for applications handling sensitive user data or financial transactions.
Implementing CSRF protection is essential to maintain the integrity of form submissions. A widely adopted method involves the use of unique, time-limited tokens. Each form generated by the server should include a distinct token that is validated upon submission. When a user submits the form, the server checks the token’s authenticity to ensure that the request originated from the intended source. Requests missing a valid token or containing an expired token are immediately rejected, regardless of the user’s authentication status.
This mechanism effectively mitigates the risk of CSRF attacks by ensuring that even if an attacker tricks a user into submitting a form, the request will be invalidated unless the attacker can replicate the server-generated token—a task that is computationally infeasible. The inclusion of such tokens is particularly important for sensitive forms like payment gateways, account settings modifications, or administrative actions.
Modern content management systems offer built-in solutions to simplify CSRF protection implementation. By leveraging existing security features such as nonce functionality, developers can enforce token-based validation consistently across all forms. This approach reduces the likelihood of human error during implementation and ensures a uniform security posture throughout the platform. Regular audits of CSRF token mechanisms are recommended to verify that tokens are unique, time-limited, and correctly validated on the server side, thereby maintaining robust defense against emerging threats.
Data Encryption
Data encryption is a cornerstone of secure web applications, particularly when handling sensitive information such as personal details, payment data, or login credentials. Without encryption, transmitted data can be intercepted by attackers using network sniffing or man-in-the-middle attacks, compromising confidentiality and integrity. HTTPS, or Hypertext Transfer Protocol Secure, is the foundational technology that ensures encrypted communication between clients and servers. Enforcing HTTPS across all forms guarantees that data remains encrypted in transit, significantly reducing the risk of unauthorized access.
Beyond transmission, encrypting data at rest is equally important. Storing sensitive information in plaintext within databases exposes it to breaches, unauthorized access, and potential misuse. Implementing encryption algorithms such as AES (Advanced Encryption Standard) provides an additional layer of security, safeguarding stored data even if database access is compromised. It is critical to manage encryption keys with the utmost care. Keys should never reside alongside encrypted data or within version-controlled repositories. Secure key management practices, including regular rotation and restricted access, are essential for maintaining the integrity of encrypted information over time.
Incorporating encryption strategies also involves considering performance and compatibility. While encryption adds computational overhead, modern servers and cloud infrastructure often support hardware-accelerated encryption, minimizing latency impacts. Additionally, developers must ensure that encryption does not impede legitimate operations such as search functionality or reporting, which may require secure data decryption under controlled conditions. Balancing security, usability, and performance ensures a robust encryption framework that protects both users and organizational data.
Best Practices for Secure Form Handling
Secure form handling extends beyond rate limiting, CSRF protection, and encryption. A comprehensive security strategy incorporates multiple layers of defense to minimize risks and maintain user trust. Input validation is a primary consideration. All data submitted through forms should be rigorously validated to prevent injection attacks, including SQL injection, cross-site scripting (XSS), and command injection. Employing server-side validation ensures that malicious input cannot bypass client-side checks.
Another critical practice is logging and monitoring form activity. Tracking submission patterns enables early detection of abnormal behavior, including potential abuse or automated attacks. Logs should include information about IP addresses, user agents, timestamps, and submission frequency, allowing administrators to analyze trends and respond proactively. Monitoring combined with automated alerts can help mitigate attacks before they escalate into significant security incidents.
Regular software updates and patching are also essential for secure form handling. Vulnerabilities in web frameworks, plugins, or libraries can be exploited by attackers to bypass security measures. Keeping all components up to date ensures that known vulnerabilities are addressed promptly, reducing the risk of exploitation.
Additionally, adopting a principle of least privilege for user accounts and application roles enhances security. Users and system components should only have access to the minimum resources necessary for their functions. This limits the potential impact of a compromised account or service, containing any breaches and preventing lateral movement within the system.
Advanced Techniques and Considerations
For organizations managing high-volume or sensitive applications, advanced security techniques further reinforce form protection. Adaptive authentication mechanisms, for instance, dynamically adjust verification requirements based on risk factors such as geographic location, device reputation, or anomalous behavior patterns. Users exhibiting unusual activity may face additional verification steps, such as multi-factor authentication (MFA), without inconveniencing typical users.
Implementing honeypots is another subtle yet effective approach. Invisible form fields or other decoy mechanisms can detect automated submissions by bots. Legitimate users do not interact with these fields, so any submission containing data in honeypot fields indicates potential malicious activity, triggering automated defenses such as rate limiting or temporary blocking.
Security-conscious organizations should also consider data anonymization and tokenization where possible. Replacing sensitive fields with tokens or hashed values can reduce the exposure of personally identifiable information (PII) in case of a breach. When combined with encryption and rigorous access controls, tokenization enhances overall data resilience against compromise.
Performance Optimization Strategies
Form performance directly impacts user experience, with slow-loading or unresponsive forms leading to frustration and abandonment. Implementing optimization strategies ensures forms remain fast and responsive regardless of complexity or traffic levels.Lazy loading defers loading non-critical form resources until needed, reducing initial page load times. This proves particularly valuable for forms containing numerous fields, media elements, or complex functionality.
Script and stylesheet lazy loading ensures only essential resources load initially, with additional resources loading as users interact with forms. This reduces initial payload sizes and improves perceived performance.
Image lazy loading prevents media-heavy forms from impacting initial load times. Images load as they approach the viewport, rather than all loading simultaneously during page load.Caching reduces server load and improves response times by storing frequently accessed data in quickly accessible locations. Multiple caching layers provide cumulative performance benefits.Browser caching stores static form resources locally, eliminating repeated downloads for returning visitors. Proper cache headers ensure browsers cache appropriate resources for suitable durations.
Server-side caching stores rendered form HTML, reducing processing requirements for repeated requests. Object caching stores database query results, eliminating redundant database operations.Content Delivery Networks (CDNs) distribute form resources across geographically distributed servers, reducing latency by serving resources from locations nearest to users.
Database Optimization
Database performance significantly impacts form functionality, particularly when loading existing data for editing or retrieving options for dropdown fields. Implementing database optimization strategies ensures queries execute quickly even as data volumes grow.Proper indexing dramatically improves query performance by enabling rapid data location. Indexes should exist on fields frequently used in WHERE clauses, JOIN conditions, or ORDER BY statements.
Query optimization involves analyzing execution plans and refining queries to minimize resource consumption. Avoiding SELECT statements, limiting result sets, and using appropriate JOIN types all contribute to improved performance.Database connection pooling reduces overhead associated with establishing database connections. Reusing existing connections rather than creating new ones for each request improves efficiency.Efficient code executes faster and consumes fewer resources, contributing to overall form performance. Regular code review and optimization maintains performance as functionality expands.
Minimizing database queries reduces latency and server load. Combine related queries when possible, and leverage caching to avoid repeated queries for identical data.Efficient algorithms reduce processing time and resource consumption. Analyze algorithmic complexity and optimize bottlenecks identified through profiling.Code minification removes unnecessary characters from scripts and stylesheets, reducing file sizes and transfer times. Combine multiple files where appropriate to minimize HTTP requests.
Accessibility Considerations
Creating accessible forms ensures all users, regardless of abilities or assistive technologies, can successfully interact with your content management interface. Implementing accessibility best practices demonstrates inclusivity while often improving usability for all users.Proper HTML structure provides meaning and context to assistive technologies, enabling users to understand form organization and purpose. Semantic elements convey information beyond mere visual presentation.Form fields require associated label elements that describe their purpose. Labels should be explicitly linked to fields through for attributes matching field IDs, ensuring assistive technologies correctly announce field purposes.
Fieldset and legend elements group related fields, providing context and organization. This proves particularly valuable in complex forms with multiple sections or related field groups.Many users rely on keyboards rather than pointing devices for navigation. Ensuring forms function completely through keyboard input proves essential for accessibility.
Logical tab order enables users to progress through forms sequentially without confusion. The natural DOM order typically provides appropriate tab sequences, but tabindex attributes allow customization when necessary.
Visible focus indicators show which element currently has keyboard focus. Default browser focus styles should never be removed without providing alternative, equally visible indicators.Keyboard shortcuts can enhance efficiency for power users but should never conflict with assistive technology or browser shortcuts. Document any custom shortcuts clearly for user reference.
Screen Reader Compatibility
Screen readers vocalize page content for users with visual impairments. Forms must provide appropriate information enabling screen reader users to understand and complete forms independently.
ARIA attributes supplement semantic HTML, providing additional context where native elements prove insufficient. aria-label and aria-describedby attributes offer alternative descriptions and supplementary information.Error messages require association with relevant fields through aria-describedby or aria-errormessage attributes. This ensures screen reader users receive error information in context rather than requiring manual search.Dynamic content updates should be announced to screen reader users through ARIA live regions. This ensures users remain informed about form status changes, validation results, and other dynamic feedback.
Visual elements must provide sufficient contrast ensuring visibility for users with various visual abilities. Relying solely on color to convey information excludes users with color vision deficiencies.WCAG guidelines specify minimum contrast ratios between text and backgrounds. Meeting these standards ensures legibility across diverse viewing conditions and visual abilities.Information conveyed through color should also be available through alternative means such as text, icons, or patterns. For instance, error states shouldn't rely solely on red coloring but should include error icons or text indicators.
Testing and Validation
Regular accessibility testing ensures forms remain accessible as they evolve. Multiple testing approaches provide comprehensive accessibility assurance.
Automated testing tools identify many accessibility issues efficiently. However, automated tools cannot catch all problems, making manual testing essential.
Manual keyboard testing verifies complete keyboard operability. Navigate through entire forms using only keyboard input, ensuring all functionality remains accessible.
Screen reader testing provides insight into experiences of screen reader users. Testing with multiple screen readers reveals compatibility issues and areas for improvement.
User testing with people with disabilities provides invaluable feedback regarding real-world accessibility. Their perspectives often reveal issues overlooked by technical testing.
Integration with External Services
Extending form functionality through external service integration opens numerous possibilities for enhancing workflows, automating processes, and connecting disparate systems. Understanding integration approaches enables creating sophisticated, interconnected form solutions.Forms requiring payment processing necessitate secure, reliable payment gateway integration. Multiple payment processors offer varying features, fee structures, and regional availability.
Stripe provides comprehensive payment processing with extensive documentation and developer-friendly APIs. Integration involves securely handling payment information while maintaining PCI compliance.PayPal offers widespread recognition and trust, with integration options ranging from simple buttons to advanced API implementations. Consider both PayPal balance payments and credit card processing through PayPal.Security proves paramount when handling payment information. Never store complete credit card numbers, and leverage tokenization to minimize exposure to sensitive payment data.
Customer Relationship Management (CRM) systems centralize customer data and interaction history. Integrating forms with CRM systems ensures submission data automatically populates customer records, eliminating manual data entry and ensuring information accuracy.Salesforce integration through APIs enables automatic contact and opportunity creation based on form submissions. Field mapping ensures form data populates appropriate CRM fields.HubSpot provides marketing automation capabilities alongside CRM functionality. Form submissions can trigger automated workflows, email sequences, and lead scoring.Custom CRM integrations leverage APIs to connect forms with proprietary or specialized CRM systems. Webhook functionality enables real-time data transmission to external endpoints.
Email Marketing Platform Integration
Building email lists through form submissions requires integration with email marketing platforms. These integrations enable automated subscriber addition, segmentation, and triggered campaign delivery.Mailchimp integration adds form submitters to specified audiences with appropriate tags and merge fields. Double opt-in functionality ensures compliance with anti-spam regulations.Constant Contact, AWeber, and other email marketing platforms offer similar integration capabilities through APIs or native JetFormBuilder integrations.
Compliance with email marketing regulations proves essential. Implement clear opt-in mechanisms, provide unsubscribe functionality, and maintain records of consent.Zapier enables connecting forms with thousands of applications without custom development. Creating "Zaps" automates workflows spanning multiple platforms.
Trigger configuration specifies when Zaps should execute, typically upon form submission. Actions define what should occur, such as creating records, sending notifications, or updating spreadsheets.Multi-step Zaps enable complex workflows involving multiple applications and conditional logic. Filters ensure actions execute only when specific conditions are met.Data transformation through Zapier's built-in formatters enables manipulating form data before sending to connected applications, ensuring compatibility and proper formatting.
Webhooks provide flexible integration mechanisms for connecting forms with any system capable of receiving HTTP requests. Upon form submission, configured webhooks send submission data to specified URLs.Request configuration includes specifying HTTP methods (typically POST), headers for authentication or content type specification, and body structure for transmitted data.
Authentication mechanisms protect webhook endpoints from unauthorized access. API keys, tokens, or OAuth implementation ensures only legitimate requests are processed.Error handling and retry logic ensures reliable data transmission even when temporary network issues or endpoint unavailability occurs. Logging facilitates troubleshooting integration issues.
Mobile Responsiveness and Cross-Device Compatibility
With mobile devices accounting for substantial web traffic, ensuring forms function flawlessly across screen sizes and input methods proves essential. Responsive design principles and mobile-specific optimizations create consistent experiences regardless of device.
Responsive layouts adapt to available screen space, maintaining usability and aesthetics across devices. CSS frameworks and flexible layout techniques enable creating forms that look and function well everywhere.
Flexible grids using percentage-based widths or CSS Grid enable layouts that adapt to container sizes. This ensures proper sizing regardless of screen dimensions.
Media queries apply device-specific styling based on screen characteristics. Breakpoints define screen sizes where layout adjustments occur, optimizing presentation for various device categories.Viewport meta tags ensure proper scaling on mobile devices. Without proper viewport configuration, mobile browsers may render desktop layouts at full size, requiring zooming and horizontal scrolling.
Touch interfaces require larger tap targets than mouse-based interfaces. Ensuring adequate sizing and spacing prevents frustration from missed taps and unintended selections.Minimum tap target sizes should meet accessibility guidelines, typically recommending at least 44x44 pixels. This ensures users can accurately select elements without precision challenges.
Adequate spacing between interactive elements prevents accidental activation of adjacent controls. This proves particularly important for forms with numerous closely positioned fields or buttons.Touch gesture support enhances mobile usability. Swiping between form steps, pinching to zoom images, or other intuitive gestures align with user expectations from mobile applications.
HTML5 input types trigger appropriate keyboards on mobile devices, streamlining data entry. Using correct input types enhances user experience through context-appropriate input mechanisms.
Performance on Mobile Networks
Mobile devices often operate on cellular networks with varying speeds and reliability. Optimizing form performance for mobile networks ensures usability regardless of connection quality.Reducing page weight through image optimization, code minification, and eliminating unnecessary resources decreases load times on slower connections.
Progressive enhancement ensures core functionality operates even when advanced features fail to load completely. Forms should remain submittable even if JavaScript fails or loads slowly.Offline capability through service workers enables continued form use during connectivity interruptions. Submissions can queue for transmission when connectivity resumes.Comprehensive device testing identifies compatibility issues and ensures consistent experiences across the device landscape. Multiple testing approaches provide thorough coverage.
Physical device testing provides accurate representation of real-world experiences. Testing on actual smartphones and tablets reveals issues simulators might miss.Browser DevTools device emulation enables rapid testing across numerous screen sizes and device characteristics. While not perfectly accurate, emulation efficiently identifies most responsive design issues.
Cloud-based testing services provide access to extensive device and browser combinations without requiring physical device libraries. Services like BrowserStack enable testing rare device/browser combinations.User testing with mobile devices reveals usability issues from actual user perspectives. Observing real users interacting with forms on their devices provides invaluable feedback.
Advanced Workflow Automation
Automating workflows surrounding form submissions reduces manual effort, accelerates processes, and ensures consistency. Sophisticated automation transforms forms from simple data collection tools into integral components of comprehensive business processes.Many scenarios require review and approval before CCT items become publicly visible. Implementing approval workflows ensures quality control while providing clear processes for content progression through publication stages.
Status field tracking enables monitoring item progression through workflow stages. Initial submissions receive "Pending Review" status, advancing to "Approved" or "Rejected" based on reviewer actions.Email notifications alert reviewers when items require attention. Automated reminders ensure timely review completion, preventing items from languishing in queues indefinitely.Revision history tracking documents changes throughout the approval process. Understanding what changed, when, and by whom proves valuable for accountability and dispute resolution.
Upon approval or publication, automated distribution ensures content reaches appropriate audiences and platforms. Integration with various distribution channels amplifies content reach without manual effort.Social media posting through platform APIs automatically shares new CCT items with followers across Facebook, Twitter, LinkedIn, or other networks. Scheduling functionality enables posting at optimal times for engagement.
Email newsletter integration automatically includes new items in upcoming newsletter editions. Template systems format CCT data into attractive, readable newsletter content.RSS feed generation enables content syndication to feed readers, news aggregators, and other distribution channels. Automated feed updates ensure subscribers receive timely notifications of new content.
Implementing dynamic access control enables different users to view or edit different CCT items based on relationships, permissions, or other criteria. This proves essential for multi-author environments or client-facing content management.Ownership-based access restricts editing capabilities to item creators and designated administrators. Users can modify their own submissions but cannot alter content created by others.Role-based permissions grant capabilities based on user roles. Editors might access all items, authors only their own content, and contributors might face additional restrictions.Custom capability checking enables granular permission control based on complex business rules. Integration with membership plugins or custom permission systems provides ultimate flexibility.
Scheduled Actions and Automation
Time-based automation enables scheduling actions to occur at specific times or intervals without manual intervention. This functionality proves valuable for time-sensitive content management and maintenance tasks.
Scheduled publication allows users to create CCT items that automatically become visible at predetermined times. This facilitates planning content calendars and ensuring timely publication without requiring manual intervention.
Expiration functionality automatically unpublishes or archives items after specified periods. This ensures time-sensitive content doesn't remain visible indefinitely after relevance expires.
Periodic cleanup tasks automatically remove draft items abandoned for extended periods, maintaining database cleanliness without manual review.
Reminder systems send notifications before scheduled events occur. For webinar CCT items, automated reminders ensure registrants receive timely notifications before sessions begin.
Conclusion
The development of front-end forms for CCT (Customer/Client/Content) management within a user dashboard represents a critical intersection of usability, functionality, and efficiency. Creating forms that allow users to insert and modify items seamlessly is not merely a technical task—it is an exercise in understanding user behavior, system design, and front-end best practices. Throughout the design and implementation process, several key insights have emerged that underscore the importance of thoughtful form creation in modern web applications.
First and foremost, usability lies at the heart of effective form design. A user dashboard serves as the central hub where individuals interact with the system, access critical information, and manage data. Forms that are intuitive and easy to navigate reduce cognitive load and minimize errors. By incorporating clear labeling, logical grouping of fields, and real-time validation feedback, users can confidently input data without confusion or frustration. This emphasis on usability extends to error handling as well: informing users of incorrect or missing inputs in real time ensures a smoother workflow and enhances user satisfaction. Furthermore, responsive design ensures that forms remain accessible across devices, which is particularly important in an era where mobile and tablet access often surpasses desktop usage.
From a functional perspective, the insertion and modification of dashboard items require careful attention to data integrity and system consistency. Forms must capture essential information accurately, validate inputs effectively, and submit data to the back-end reliably. Implementing robust front-end validation prevents erroneous data from entering the system, reducing downstream processing issues and maintaining the integrity of the CCT database. Equally important is the ability to modify existing items effortlessly. Editing forms should prepopulate existing data and allow users to make targeted changes without re-entering redundant information. This not only enhances efficiency but also strengthens user trust in the platform by demonstrating reliability and flexibility.
The technical implementation of these forms necessitates a blend of modern front-end technologies and frameworks. Utilizing component-based libraries or frameworks—such as React, Vue, or Angular—enables developers to create reusable form elements, enforce consistent styling, and simplify state management. Dynamic forms that respond to user actions, such as conditional fields or live previews, improve interactivity and engagement. Moreover, integrating APIs for data submission and retrieval ensures that the forms are connected to the broader system architecture, allowing seamless communication between front-end and back-end services. This integration is crucial for real-time updates and maintaining the accuracy of the dashboard's content.
Equally significant is the role of user feedback and iterative improvement. The creation of forms should not be viewed as a one-time task but as an evolving process informed by user behavior and analytics. By monitoring user interactions, identifying bottlenecks, and gathering feedback, developers can refine forms to better meet user needs. Small improvements, such as optimizing field order, introducing auto-complete suggestions, or enhancing accessibility for screen readers, can have a substantial impact on overall usability. Such an iterative approach ensures that the dashboard evolves alongside user expectations, maintaining relevance and efficiency over time.
Finally, the creation of forms for item insertion and modification reinforces the broader objective of effective CCT management: empowering users to manage content with confidence, efficiency, and accuracy. By combining usability principles, technical rigor, and iterative enhancement, developers can deliver a dashboard that is both functional and user-friendly. The outcome is a system that not only streamlines data management but also elevates the overall user experience, encouraging consistent engagement and fostering trust in the platform.
front-end CCT management through well-designed forms is more than a technical necessity—it is a cornerstone of effective user interaction and system reliability. By prioritizing usability, data integrity, and iterative development, developers create a dashboard environment that supports seamless item insertion and modification, ultimately enhancing user satisfaction and operational efficiency. The integration of modern technologies, responsive design, and dynamic interactions ensures that these forms serve as both a practical tool and a reflection of thoughtful system design, underscoring the critical role of front-end development in modern web applications.
Frequently Asked Questions
Where can I download my products after I have completed the purchase?
Your products are available immediately after you have made the payment. You can download them from your Member's Area. Right after your purchase has been confirmed, the website will transfer you to Member's Area. All you will have to do is login and download the products you have purchased to your computer.
How long will my product be valid?
All Testking products are valid for 90 days from the date of purchase. These 90 days also cover updates that may come in during this time. This includes new questions, updates and changes by our editing team and more. These updates will be automatically downloaded to computer to make sure that you get the most updated version of your exam preparation materials.
How can I renew my products after the expiry date? Or do I need to purchase it again?
When your product expires after the 90 days, you don't need to purchase it again. Instead, you should head to your Member's Area, where there is an option of renewing your products with a 30% discount.
Please keep in mind that you need to renew your product to continue using it after the expiry date.
How often do you update the questions?
Testking strives to provide you with the latest questions in every exam pool. Therefore, updates in our exams/questions will depend on the changes provided by original vendors. We update our products as soon as we know of the change introduced, and have it confirmed by our team of experts.
How many computers I can download Testking software on?
You can download your Testking products on the maximum number of 2 (two) computers/devices. To use the software on more than 2 machines, you need to purchase an additional subscription which can be easily done on the website. Please email support@testking.com if you need to use more than 5 (five) computers.
What operating systems are supported by your Testing Engine software?
Our testing engine is supported by all modern Windows editions, Android and iPhone/iPad versions. Mac and IOS versions of the software are now being developed. Please stay tuned for updates if you're interested in Mac and IOS versions of Testking software.