How to Create a Need for Speed Pro Street Inspired Logo in Photoshop for Beginners
In this tutorial, you are going to learn how to create a simple logo that just looks like the one in the popular game called Need for Speed: Pro Street in Photoshop. You will create the logo with these step-by -step instructions.
First thing you need to do is to prepare your workspace.
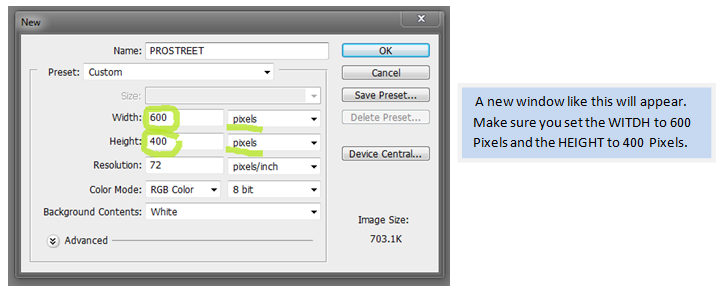
Start a new project and click File>New, or Ctrl N
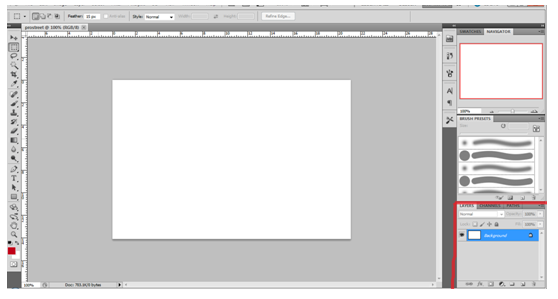
Find the LAYERS palette, located on the lower right of the work area. You will be working on this area a couple of times so familiarize yourself on where to locate so that you won’t waste your time getting lost.
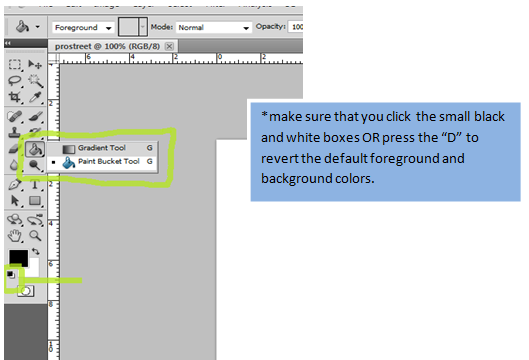
Click the paint bucket tool or press “G” to select the bucket tool. If the icon does not look like a bucket, right click on the icon and select the paint bucket option.
Select the rectangle tool or press ”U” to select the rectangle tool. Then right click on the icon to select the rounded rectangle tool.
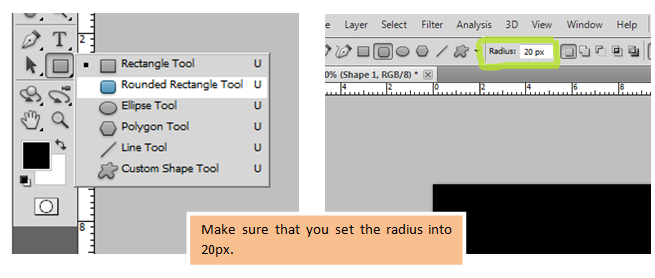
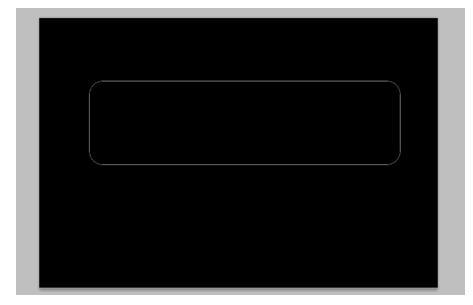
Create a rectangle shape just big as this.
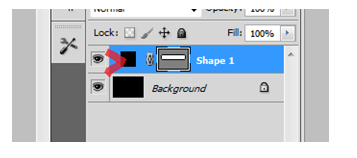
The next step is to FILL the shape with color and add a border or STROKE. Double click the black box on the “shape 1” layer to change the color. Be sure you first select the move tool by pressing the “V” hotkey to avoid any accidents.
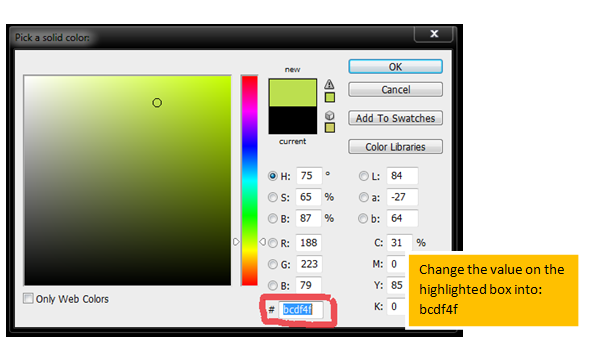
A window will ask you to pick or adjust another color. You can choose any color you want. In this logo design, a light color or shade will be used. We will choose light green. Or you could just directly type in a specific color code just like in the image below.
Select the shape layer first and then press the fx button you see just at the bottom of the layers palette.

*from time to time, you should click the save button so your work is protected from power interruptions.
Next, we will be editing the layer styles. With the options shown below we could add effects like shadows, glows, textures, and patterns, and etc, to make a certain object or a layer more beautiful. For our project, we will select the stroke effect. This adds the border on the rectangular shape we just made.

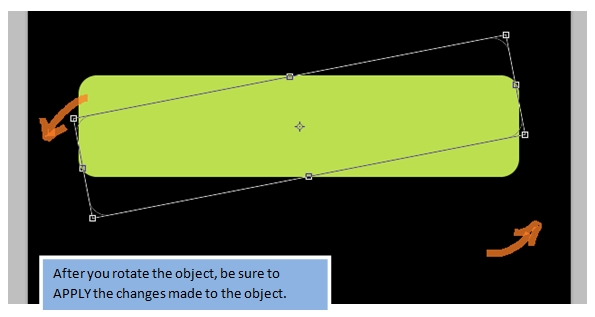
Next, press the keys “Ctrl+T” to activate the free transform tool. Then slightly drag your cursor following the directions shown on the image below to rotate the object. You could also select it from [Edit – Free Transform path]. In this part we are going to rotate the rectangle a bit, just like how it is positioned in the original logo.
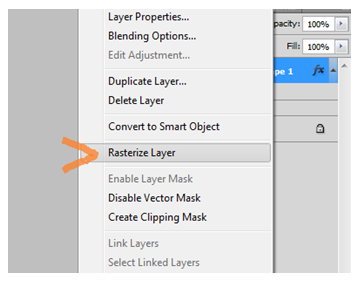
Now we have to rasterize the object as we are going to need the rasterized version of the object to be able to cut parts from it without having too much difficulty. Select the object or the rectangle shape: “shape 1” on the layers palette, then RIGHT CLICK on it and select the RASTERIZE LAYER option.
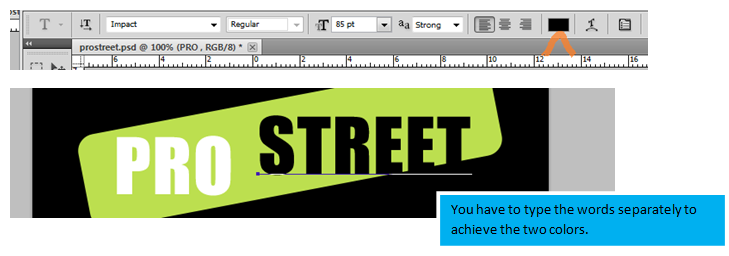
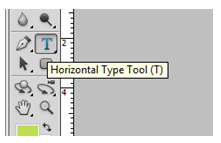 We are now going to type in the words: “PRO” and “STREET”. Click the icon showing the letter “T” as shown on the image or press: “ctrl+T” to activate the horizontal type tool. This tool enables you to type in the words needed.
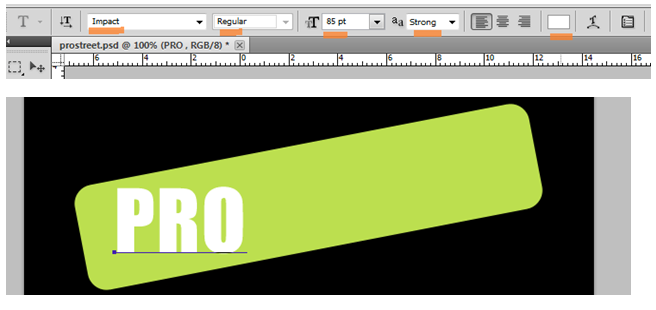
First, type the word “PRO”. You need to type it in all caps, white color, and in the font size of about 85pts.
Now type the second word “STREET”, just as they way you typed the first word, BUT in BLACK color.
The next step would be to align the words or text, then to rotate it in the same angle in which the green shape is positioned.
PRESS “V” first, then on the layers palette, select the word “pro” then HOLD SHIFT and click on the word “street”.
After that, release all the keys, and press CTRL+T to be able to transform it and rotate it. Be prepared to have to try several times if you are only starting to be familiar with the controls. It is a bit difficult at the beginning but you will master it after a couple of practice sessions.
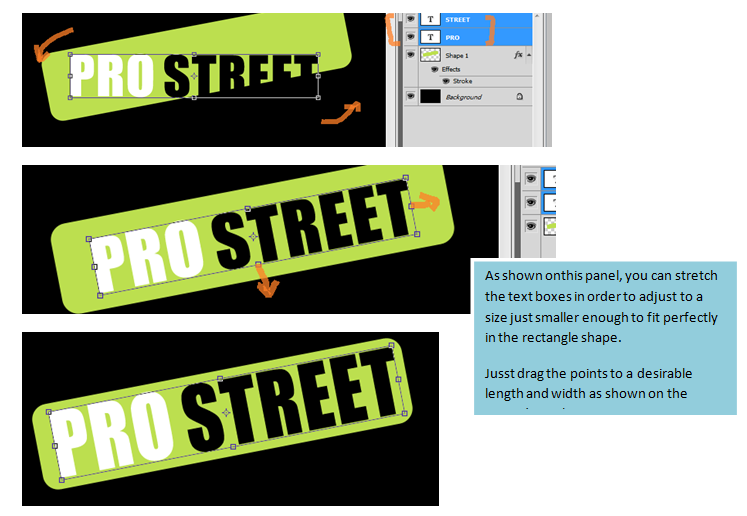
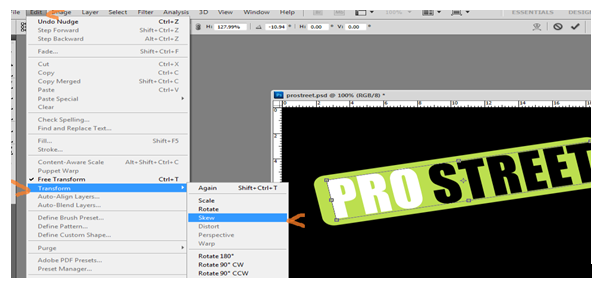
Now select the PRO and STREET layers again on the layer palette and click on EDIT- TRANSFORM –SKEW.

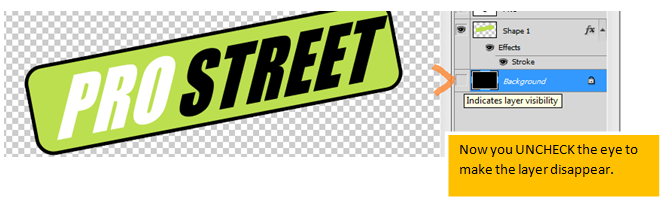
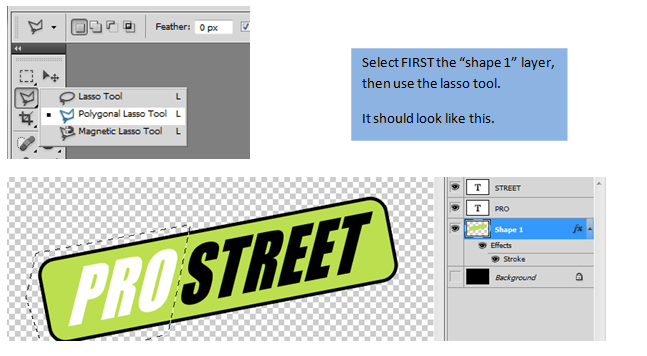
The next step would be to apply modification to the shape. CLICK the “eye” icon on the BACKGROUND layer on the layers palette to disable it temporarily.
You need to select the POLYGONAL LASSO TOOL. Right Click and then select the second option.
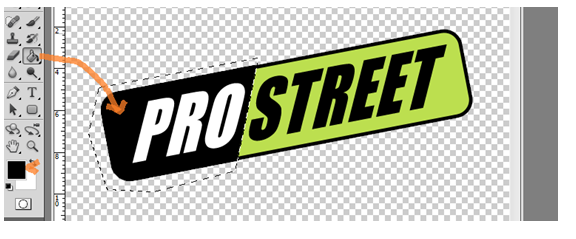
Now fill the green area INSIDE the shape, NOT outside it. It should look like the image below.
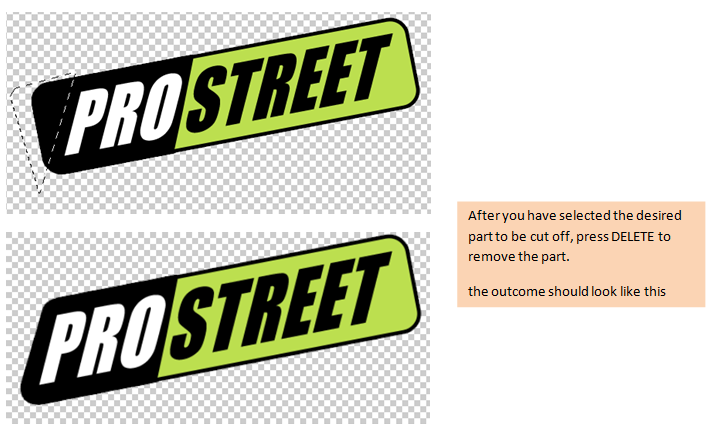
After applying the black color, press CTRL+D to deselect area. Then select the POLYGONAL LASSO tool AGAIN. This time you should select the part you are going to cut out. Your progress should look like the image below.
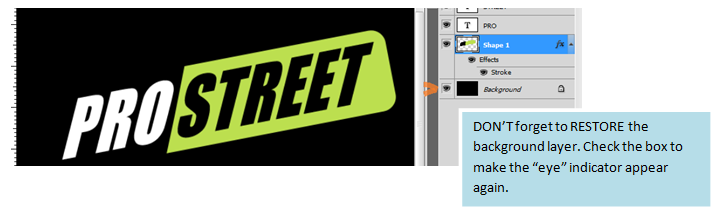
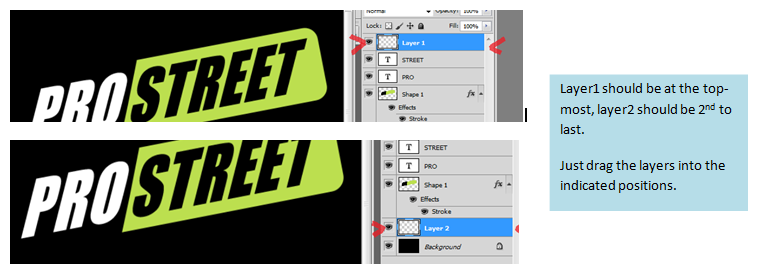
Now, for the finishing touches. Create a blank layer by pressing SHIFT+CTRL+N, and drag it to the position indicated in the image below.
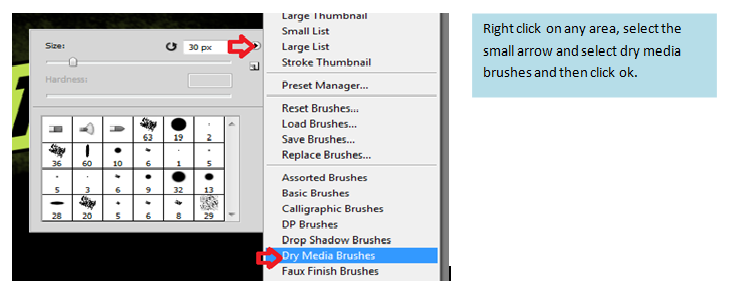
Now it’s time to play with the DRY MEDIA BRUSHES found on the BRUSH TOOL (press B).
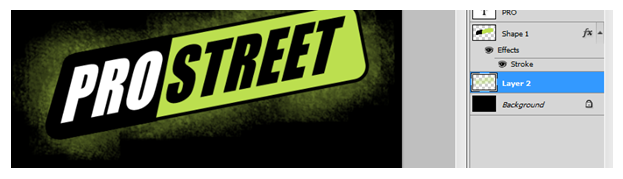
First, paint “LAYER 2”.
Now apply whatever color you like on “LAYER 1”
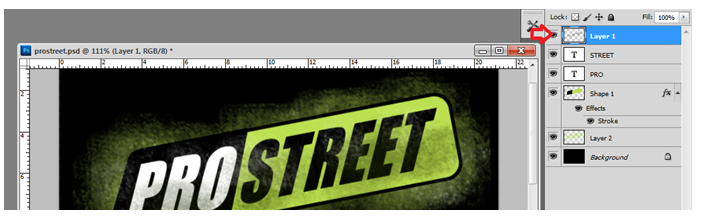
You are done. Just crop the image, and save it.
You now have a PRO STREET logo. With a little bit more practice, you can create your own logo design

I hope you learned something from this logo tutorial. Feel free to experiment with the techniques that I shared and post your creation in the comments. Everyone at TechKing looks forward to seeing them.