Stunning Optic Fiber Light Rays Tutorial

Let’s play around a bit by creating a stunning optic fiber inspired light rays background (or pattern, texture, or brush, whichever way you think of it). Just a bit of Photoshop know-how and you’ll be able to do this tutorial in a matter of minutes.
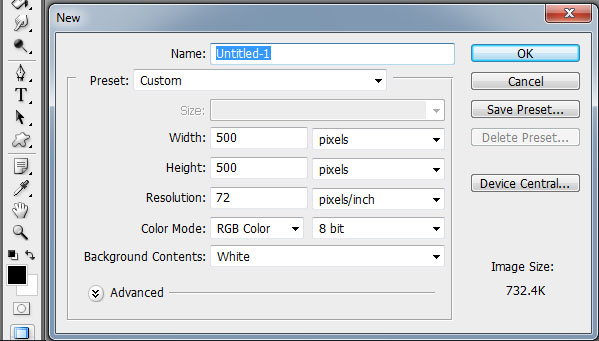
Step 1. Open a new document. Make sure the background is white. It can be any size you wish but for this tutorial, we’ll use 500 x 500 pixels. Make sure your foreground color is black, and your background color is white.
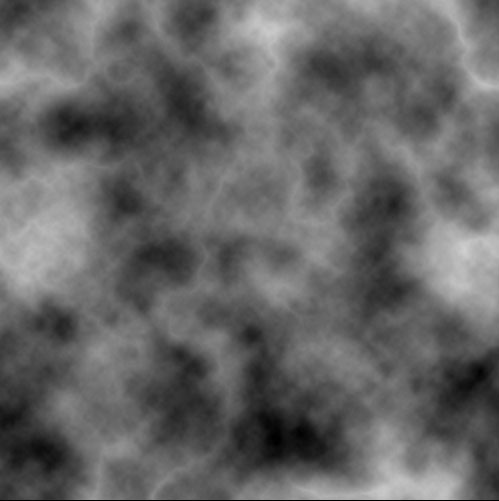
Step 2. Go to FILTER > RENDER > CLOUDS.

Step 3. Go to FILTER > RENDER > DIFFERENCE CLOUDS. Do this twice to achieve similar results below.
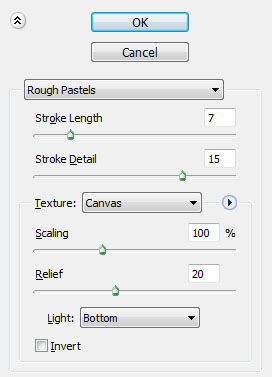
Step 4. Go to FILTER > ARTISTIC > ROUGH PASTELS and use the following values: Stroke Length 7; Stroke Detail 15; Texture Canvas; Scaling 100; Relief 20; Light Bottom. DO NOT INVERT.
The resulting image should look something like this.
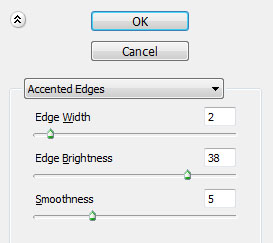
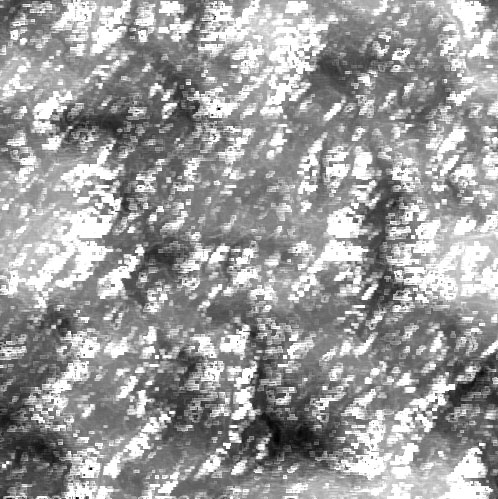
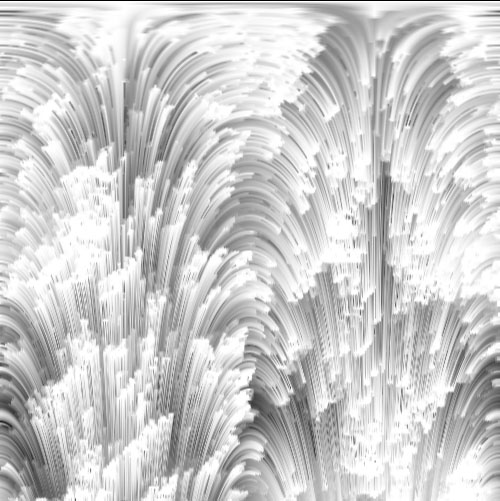
Step 5. Go to FILTER > BRUSH STROKES > ACCENTED EDGES. Set the following values: Edge Width 2; Edge Brightness 38; Smoothness 5.
This will be the result.
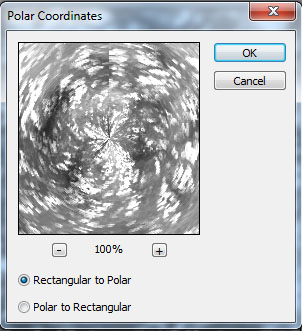
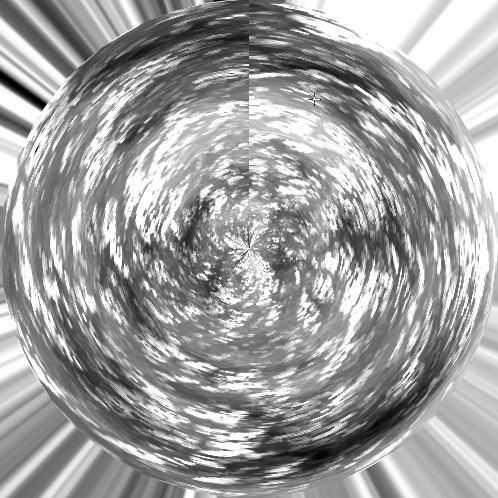
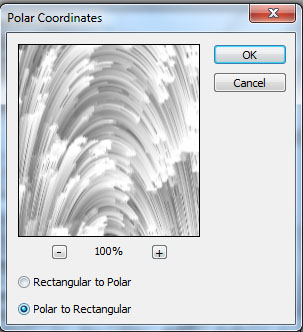
Step 6. Go to FILTER > DISTORT > POLAR COORDINATES and set it at RECTANGULAR TO POLAR.
You should achieve this result.
Step 7. Go to FILTER > STYLIZE > WIND. Do this THREE (3) times.
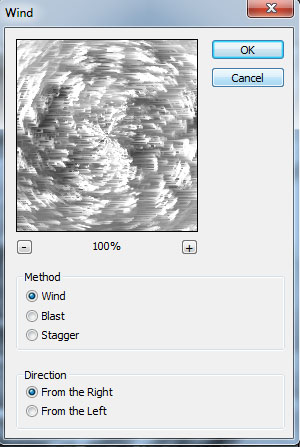
You should have something like this.
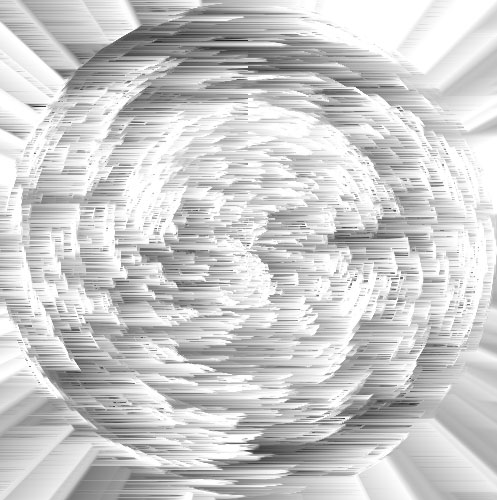
Step 8. Go to FILTER > DISTORT > POLAR COORDINATES. This time, go with POLAR TO RECTANGULAR.
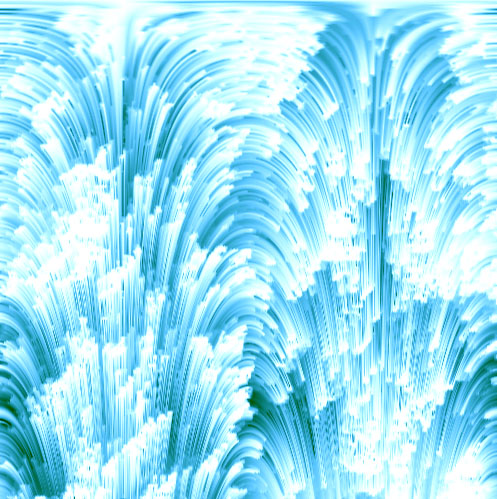
We’re getting quite close. By this step, you will already have achieved this result. It looks like a bunch of optic fibers clashing against each other.
Step 9. Time to put in a bit of color. Each and every person may have his or her own color preferences, so go to EDIT > COLOR BALANCE and just go crazy with the colors. For this tutorial, we’re going for a bright blue tint.
Hint: If you wish to add more colors, you can either blend this with gradients or other colors.
Step 10. The optic fibers seem to be a bit too sharp. Let’s add a bit of soft glow now. Duplicate this layer and go to FILTER > BLUR > GAUSSIAN BLUR. Set it to 2.5
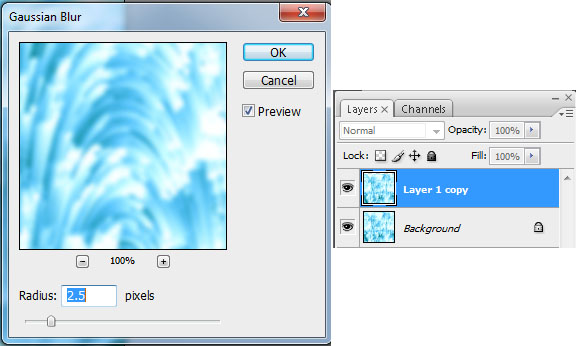
Step 11. Now it’s a little too blurred. In order to fix this, just go to the blurred layer, and change the OPACITY to 50.
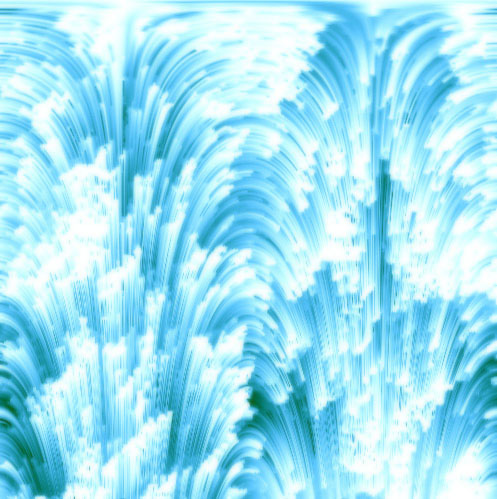
And we’re done! As mentioned, you can use this quick tutorial for backgrounds, patterns, textures, brushes, and whatnot. Just have fun with it!