Leave Your Photo In Pieces With This Photoshop Tutorial
Everyone has probably experienced heartbreak or two. Whether or not you tore apart the photo of you and your ex in anger, or your mischievous devil of a toddler decided Mommy and Daddy’s picture would make for good confetti, this tutorial is for you.

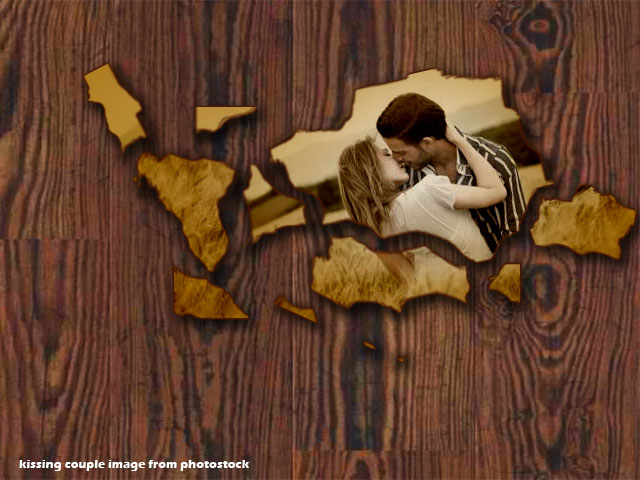
What we have here is a simple step-by-step guide on how to create a torn photograph, with pieces lying on a floor (or tabletop, depending on how you look at it). For this, you will need a stock image of a photograph (a couple, a family, a tree, take your pick) and of a wood pattern (you can even use a marble floor pattern).
STEP 1: Put your wood pattern over the background layer. Make sure it’s a separate layer, since you may need to adjust the Brightness and Contrast to suit the photograph you will be adding later.

STEP 2: Place the photograph in a new layer over the wood pattern layer.

STEP 3: Add a layer style to the photograph. Click on Inner Glow and pick a color that is somewhere between brown and orange, but a little more on brown. Change the blend mode to Linear Burn. Make sure that the Opacity is set at 100%. Range should also be at 100%, and depending on the size of your picture, increase the Size of the Inner Glow until you achieve similar results to the picture below.

STEP 4: For the next Layer Style, pick Outer Glow and set the Opacity at 100%. Make sure the Blend Mode is set to Normal. Choose a dark brown color with a little red, but more on the brown. Make sure though that your Outer Glow brown is much darker than your Inner Glow brown. Size should be around 3, and Range at 25 (again, this depends on the size of the image but just make sure the Outer Glow comes out nice and thin).

Note: It may be good to lessen the saturation of your photograph, like what I did above.
STEP 5: This will be the last Layer Style. Choose Drop Shadow and set the Blend Mode at Multiply. Opacity should be 75% at most. Then, change the direction of the shadow depending on your light source. Keep the shadow close to the photograph, so it doesn’t seem as though your photograph is floating out in space. For this tutorial, Distance was set to 7, Spread to 20, and Size to 15.

STEP 6: Pick the Eraser tool and use Chalk 23 Pixels. Depending on the size of your photograph, you may need to increase the size of the Eraser. Size 40 is recommended.

STEP 7: Start erasing your photograph into pieces.

STEP 8: Using the Marquee Tool, pick out the pieces, and press Ctrl+T to rotate and place it to your liking.

Now you have photograph pieces on the floor! Hope you enjoyed this tutorial and if you want to clean up, photoshopping a vacuum cleaner or a broom is a whole new tutorial altogether.