Be Constructive and Not Destructive in this Photo Editing Photoshop Tutorial

For a long time already, we have been enhancing and altering photographs using the settings found on Image > Adjustments. This method is what we consider as the destructive method of editing photographs and images. we may have also discovered a way that could prevent accidental manipulation or changes done upon a certain photo by making a backup copy of it located on another directory, or we made a duplicate layer of that photo and hidden on the same Photoshop document (*.psd file).
Well it is also good to secure a backup copy of the picture when starting to edit, however, sometimes we are in a hurry that we forget to make a backup of that image and proceed editing leaving you without a raw copy of that image. Plus, we cannot also create a backup copy of that photo especially we have only a limited memory left. This is very bad news in case we do not come up with a desirable edited photo.
Another disadvantage on having a duplicate layer of the original photo is that the file size of the saved Photoshop Document is pretty large. This is caused by the memory occupied by the duplicate image layer. However, by using adjustment layers, we do not have to create a duplicate layer and hide it. The adjustment layers covers or alters the normal layers under it. The advantage of using adjustment layers on editing is that the changes done on the photo is NEVER permanent UNLESS, we FLATTEN the image.
Now this tutorial will show you a few tricks in using the adjustment layers. I will not be able to demonstrate all functions we might be able to use but I will show you one of the most wanted techniques used to enhance a dull photo. This project is about enhancing a photo of a castle with dynamic lighting and improved details and shades.
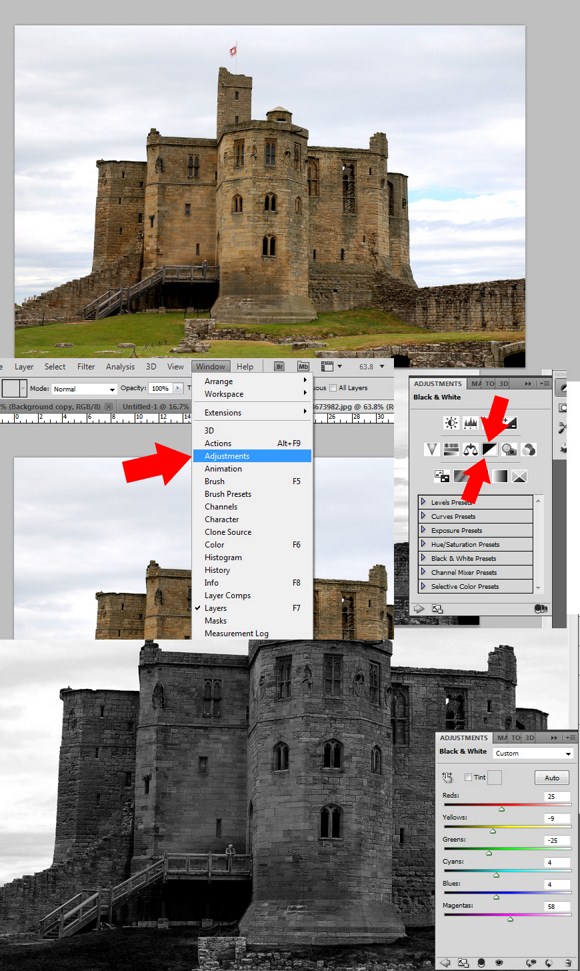
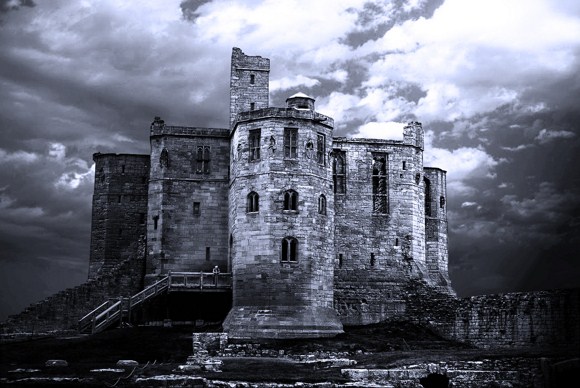
Here we have a photo of an old medieval sort of castle which I downloaded from a free stock photo site. To access and add an adjustment layer, go to window (next to the view tab) or the icon (black and white circle) found on the layers palette , and you will find the Adjustment layer sub-menu or option. You will find a palette of square shaped icons. First, we will choose the Black and White Layer. Once we have added the adjustment layer for black and white, the image will convert to grayscale, and also you will be able to adjust the color channels to achieve better details. (For this image I slightly reduced the blue, cyan, green and yellow.)
Alternatively, you can go to Layers > and Add New Adjustment Layer > Black and White to access the same effect.
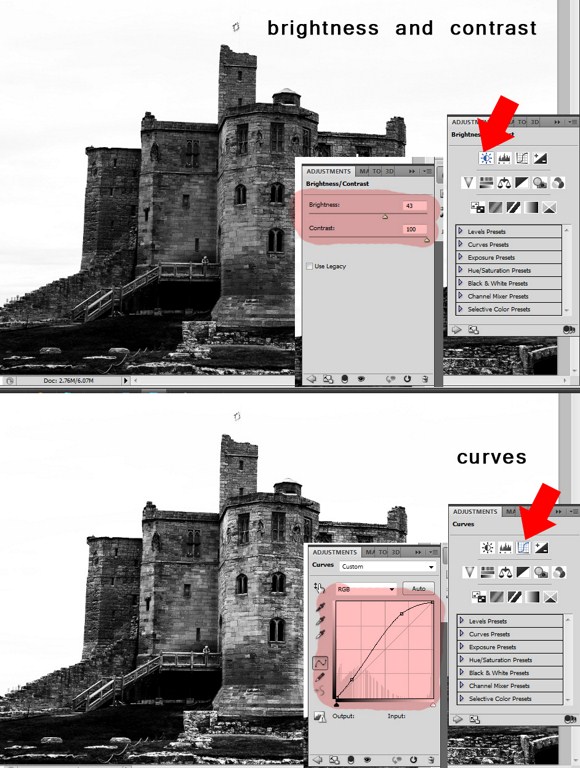
Now you already know how to add adjustment layers, let us try a few more adjustment types. Let us add the Brightness and Contrast and the Curves Layer. Add brightness and max out the contrast. Next add the curves adjustment layer, follow the curve as seen below. You will notice that this has the same effect as to adjustments on the actual photo layer, but this method gives you more control and options and of course, it is safer. Note, that you can also apply layer blend mode (example: overlay) to adjustment layers. Try it to see how it works.
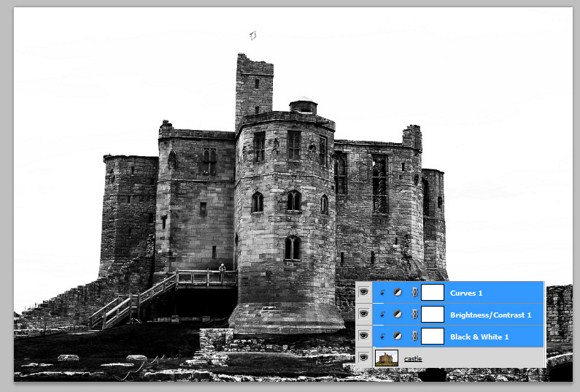
Select the 3 adjustment layers and press ALT+CTRL+G to create clipping mask.
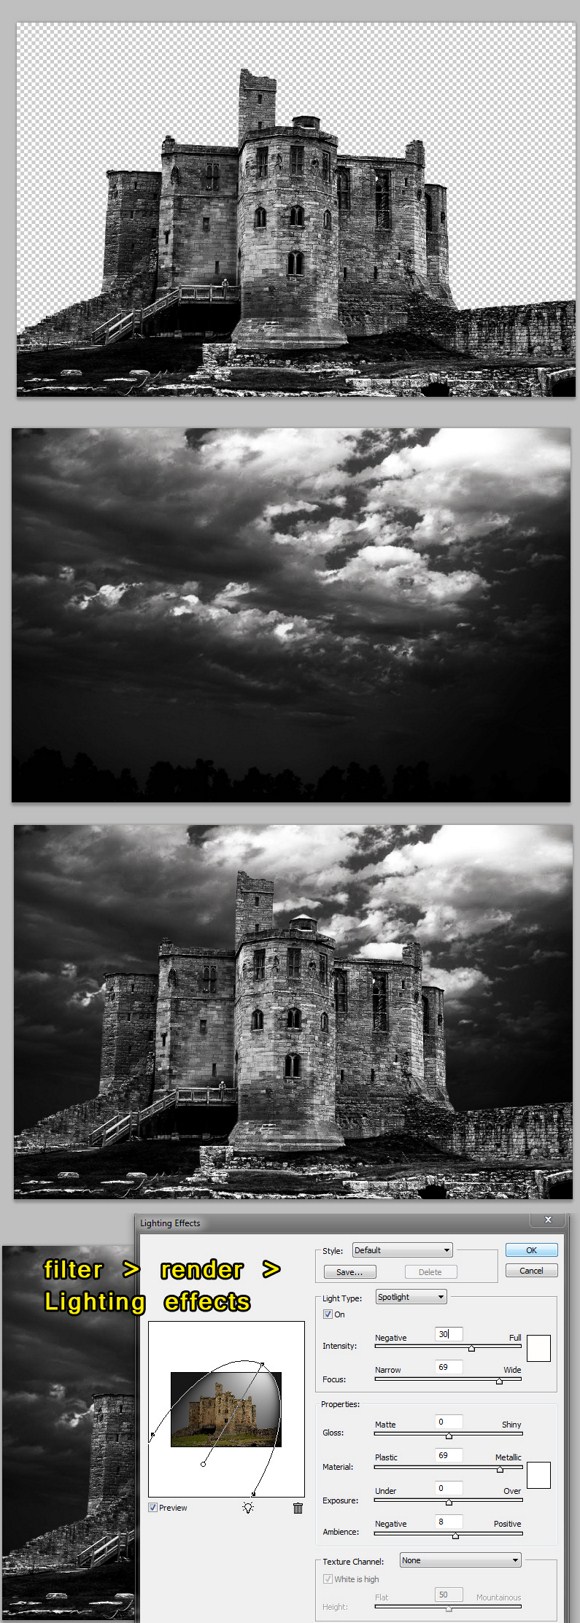
Now let’s try removing the background (using marquee tool) and import a separate photo of clouds. I imported a cloud image (edited contrast beforehand), and placed its layer under the castle layer. On the castle layer I applied spotlight lighting effects (filter > render > lighting effects).
Lastly, add the PHOTO FILTER adjustment layer and choose a cool color (blue). Remember that this adjustment layer is not a clipping mask. See the image below to be guided on the arrangement and properties of the layers.

And that’s it we have now our final result. Using adjustment layers to edit photos is a good practice. Save the final image as a jpeg file, while you save the PSD without flattening the image, for future editing.
If you have any desire at all to be a graphic designer this technique is definitely one you want to master. We hope you enjoyed it and as always please feel free to share your creations with us in the comments.