Whistle While You Work: 5 iTunes Tips and Tricks You Must Use
Most people in IT work WAY too much. We can make this time more tolerable by listenting to music or a favorite podcast. Most people will agree spending most of your life online can’t be healthy, see me as a prime example of internet health. In spending all of your time online you do pick up vast amounts of seemingly useless information along with minute chunks of data that might be useful. I figure I do have some minute tidbits of useful data that would be of value to share with the rest of the internet and since I am in a kind mood I will share them! A lot of users out there like me have an iOS device and because of this you’re forced into (some folks begrudgingly) using iTunes for your device. At times iTunes can function poorly, there are a lot of Windows users out there who will testify to several frustrating moments in day to day usage. Mac users I am not sure what your complaints might be, as I don’t have a Mac so I don’t get to enjoy your frustrations, just Windows for me. In my scouring and reading online I have come across some tips, tricks, hacks, whatever you want to call them that people may not know of that will help improve your user experience of iTunes. Perhaps some of these tips I am sharing will save you from the future heart attack, stroke, or psychotic break from iTunes related stress. Glad I can help, send me money if you’d like.
Tip #1 – Conversion Timing
Some users believe that keeping the preferences window open during a conversion with iTunes speeds up that process. I do not know if this does in fact help the conversion speed, but it’s worth a shot for those out there to test. No harm no foul and hopefully quicker conversions. Simply click on Edit and click on Preferences to open the window and keep that open while you’re ripping your Justin Beiber CD’s that I know you all have. Soon you’ll have Baby with you wherever you go, aren’t you happy!
Tip #2 -Find That App
If you’re like me and your iOS device is filled to the brim with apps you use folders to organize them. When you’re device is attached to your PC and you click on the App tab you see your list of synced apps, but you may not recall what folder that App is residing. Well you can double click on the app name in the column and it will display the location and folder on the right side of the screen. I know this isn’t the most useful thing around but it is a pretty cool feature I had no idea about and I thought I would share it.

Tip #3 – Syncing Your iTunes Library Across Multiple Computers Using Dropbox
This is one of the more complicated pieces, but it is also one of the most useful and awesome tips. Dropbox is one of my favorite things out there, having a place you can sync data to on all of your computers is so functional and useful it is crazy. Using it to sync your iTunes library is epically great and a great idea. You’ll need a Dropbox account of course and to have it set up on all the PC’s you’ll be syncing. This presents a problem in the amount of data your library will take up. If you’re like me you have ten times more data than that free 2gb of storage that Dropbox provides for free. Once you have that set it’s a pretty simple process, kind of slow, but simple. First thing is to copy your entire library to your Dropbox, this will take a lot of time, there’s no way around that. Make sure your iTunes is shut down on all the PC’s you will be syncing to. Before you open iTunes hold down the shift key, this will allow you to choose a new library to sync. Select your Dropbox synced location and let it finish setting up before moving on to another PC. You will only be able to have one copy of iTunes open at a time connected to the iTunes library synced on Dropbox. It’s a limitation on how iTunes and Dropbox will work together. This also keeps your data safe in the event you have a hard drive take a dive.
Tip #4 – Another Way To Speed Up iTunes
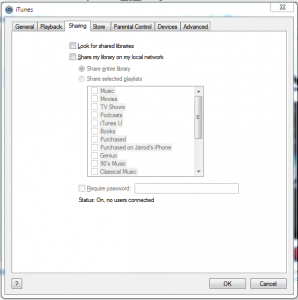
If you’ve followed the Dropbox sync method above or if you have a very specific setup on your local network like I do there are some settings in iTunes you can turn off that will help it run a bit faster and keep it from looking to the network for other shared libraries. Click on Edit then click on Preferences and go to the Sharing tab. You can remove the check on the two options listed to keep iTunes from messing with the network which will help it load faster and should be a smoother operation all around.
Tip #5 – Do Not Need Another Social Network!
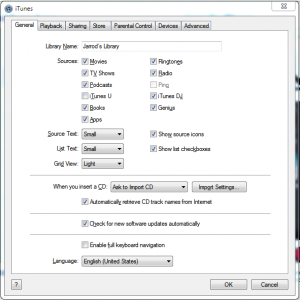
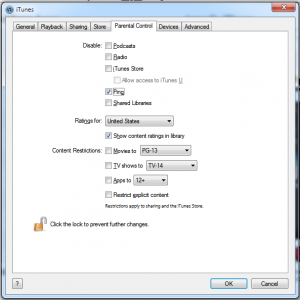
I do not need another social network to keep up on, I’ve got enough. I really am not familiar with Ping enough to completely judge it. I just don’t feel any need to participate in it as no one I know does either. So if I don’t want it, why not disable it? That’s exactly what I did. If you click on Edit, and then on Preferences you can click on the Parental Control tab and disable Ping and other features there.
I hope you find these tips useful, I know using them I think I have a better experience with iTunes in Windows. And as long as I think that (placebo effect probably) I am a-OK!
How to Remove Fake Anti Viruses Like a Pro
In the last year there has been a huge outbreak of virus’s and malware that mask themselves as anti-virus software. They tend to be difficult to remove and attempt to extort money from users to “get rid of the virus that it’s detected”. Most experienced users will easily spot the viurs as bogus and remove it, but your parents or other less experienced users may buy into the ruse and pay for the removal of the “virus” that it detects. Even then if you were to pay the extortion fee, it most likely will not be removed.
There are some nasty things it can do to your machine so you want to remove it as soon as you can. One thing to note is never click on anything in the virus window, just minimize or work around whatever window pops up until you can get it removed.
If you find a PC you are working on infected it can be annoying to get rid of it, and there is a lot of useless information online on how to get rid of it. They often try to sell you a piece of removal software, which are unnecessary since there are free alternatives. The virus will normally not be caught by your installed anti-virus software (that is if you have one) and even then it may disable your copy of McAfee or Norton to where you cannot use them for removal. This is pretty obnoxious behavior but that’s what these pieces of malware are written to do, camp out and extort money.
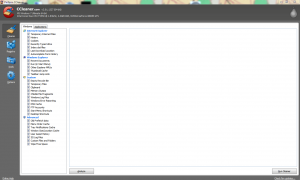 First thing to do if you come across one of these pieces of malware is to dump the temp files on your machine. It will save time during the virus and malware scans some of the fake AV virus info might be stored in the temp files also, but usually it will regenerate if you remove it and just let it go. The easiest way to get rid of all the temp files on your machine is with Ccleaner. If you have it on your machine already, fire it up and run a full cleanup. If not you may try to download it and install, but often these virus’s will prevent you from downloading and or keep you from installing things. To manually remove some of these temp files something like clicking on Start and then clicking on Run and typing in “%temp%” and clicking on OK will get you to the temporary file folder, you can then select everything and hit Shift + Delete to get rid of everything.
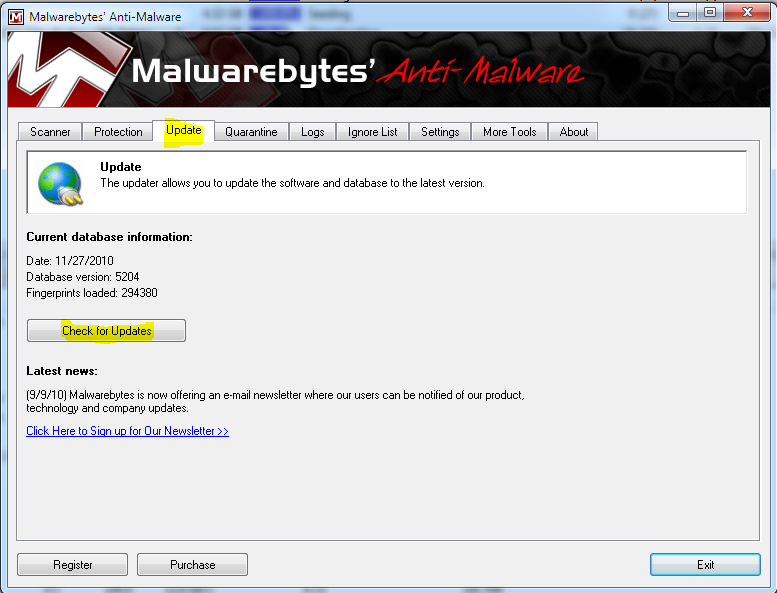
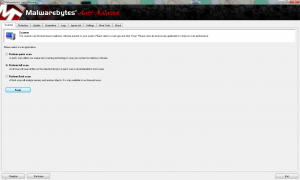 The next thing to do I would suggest is to run a full scan with Malwarebytes. If you already have it installed you’ll want to update it before running but you may not be able to get online to get an update, you can go on another PC and search out the manual update, download it to a thumb drive to take back to your infected PC. If installing a new copy you might as well grab the manual update also in the event the internal updater doesn’t work. You can check on the update tab and see what the version and update date was. Once you have the newest installed go ahead and run a full scan. This will take some time, but the fact that you dumped your temp files it will take a significantly smaller amount of time to fully go through the system. Once this scan gets to the end you’ll want to remove everything there. At times when you do the remove with Malwarebytes it can lock up and not finish the removal. It’s an annoying problem but it doesn’t happen every time, so it’s worth running. Reboot your machine and see if the fake AV software is still there.
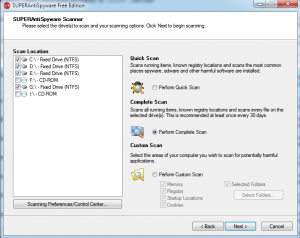 If you’ve made it to here you’re Malwarebytes scan has locked up, or the virus was still there after you rebooted it is time to move on to another malware removal tool, this one is called SuperAntiSpyware. This is a powerful removal tool that after everything else has failed should get the virus removed for good. Just like you did with Malwarebytes you’ll want to download the installer and manual updater file, if you can’t on your infected PC, do it on another and copy it over with a thumb drive. Also as with Malwarebytes you will want to run a full scan on the PC to remove as much as possible. This will take some time but when it’s done you should have a lot to remove. Go ahead and let it remove everything and reboot the machine. This should get it cleaned up.
Once you’ve got the machine back up and it is clean, you will want to make sure your installed anti-virus software is still functional and to update it, make sure you keep it updated and run regular scans. Hopefully you can prevent future infections that way. Don’t click on anything you consider strange or open attachments from people you do not know. Basic safe surfing habits and a good anti-virus hopefully will keep you safe, but there are always those odd occasions things like this happens. If there are any other ideas or good methods to dump these virus’s please comment below and let me know.
Virtual Box: Running Your Own Virtual OS
Virtual Box is a free, open-source virtualization piece of software from Sun Microsystems (Now Oracle) that allows you to install and run a second operating system on your PC in a virtual enviroment. Virtual box runs on several operating systems natively, the list includes Windows, Linux, OSX, and Open Solaris. So if you’re running any one of those, you’re able to download the Virtual Box software and install what Virtual Box calls a “Guest Operating System”.
The list for available operating systems that can be installed under Virtual Box is pretty massive. It covers several flavors of the Windows operating system family; Windows 7, Vista, 2000, Server 2003 and 2008, XP, and NT. In those Windows versions the 32 bit and 64 bit versions are both compatible. They mention 98, but it apparently has some issues, surprisingly (not really) there is no mention of ME. There are too many flavors of Linux to even mention, it looks like the current big name players are all listed from Ubuntu, Fedora, Red Hat, SUSE. OSX is another operating system you can install to your virtual machine. The amount of options that you can install from your OS to another OS are pretty huge, and best of all this is an open-source, heavily documented and free piece of software.
There are a ton of uses for having a virtual operating system on your PC, the biggest of those is for developers to have multiple operating systems at their fingertips in an easy and fast launch enviroment. It’s a great and quick way to test out different operating systems for whatever you’re working on. Web development and different browsers and operating systems is probably one of the biggest reasons and uses for having a virtual machine. Testing other installable software pieces and working in development enviroments not native to your installed OS is another great reason. Being able to develop for the iPhone without a Mac under Virtual Box is a possibility that many users may want to look at if they’re looking to test that out.
Installing Virtual Box is very simple. You will need a couple of things before you go forward with installing the software. The first of those things is checking for hard drive space. You will want to give yourself enough room to install the operating system and have some extra room for software and whatever else you might need. You’d probably want to give yourself at a minimum 10 to 15 gigs of free space, so move or delete things and make sure you’ve got the space before you bother to download Virtual Box, which can be found in the link I’ve provided here. Once you’ve got your space free and Virtual Box downloaded you’ll want to go ahead and grab your guest operating system of choice. Those installs can be done from the installable media of your operating system of choice. Another option is to get a pre-built image for your guest operating system, which is a great option. You can check out some of those pre-built images here. Check the main website of your guest operating system for the ISO image or grab the media you have on hand and we’ll start the installation process.

Double click the Virtual Box installer to start the installation, let it go through and agree with everything, just your basic installation. Once that is done launch the application and we’ll begin installing a guest operating system. In these examples we’ll go with Ubuntu as our OS. Once Virtual Box loads, click on New on the top left hand side, you will be greeted with a New Virtual Machine Wizard window with an option of Next or Cancel, click Next.
You’re now able to name the virtual machine and select the operating system that you will be installing. We’ll go ahead and name it ubuntu-test as we’re testing out Ubuntu. You’ll want to select Linux and Ubuntu from the menu below. Go ahead and click next and you’ll move on to the memory selection slider bar. Here you will decide how much RAM to delegate to your virtual operating system when it is running. I went with 1 gigabyte, that’s 1/4th of my entire amount of RAM and should be enough.

You now have to select where to install the operating system on your PC. This being your first time I will assume you will want to select the box for Boot Hard Disk and click the radio button for Create new hard disk and then click Next. The Hard Disk Storage type screen comes up now and you will need to decide what kind of disk to create. For this example you’ll want to select a fixed-size storage versus a dynamically expanding storage. It being a virtual machine you’re not going to be adding a ton of data to it, so go ahead with a fixed size. You’ll be given a slider to select the drive size you want, go ahead and give it the amount that you previously decided on using, go ahead and click Next. On the next screen click on Finish and wait for the drive to be created.

The next thing will be to actually add your Ubuntu iso to the virtual disk you’ve created. Click on Settings and then click on Storage and select your Ubuntu ISO file. Once you do that, just double click on your Ubuntu guest operating system virtual drive to start up the disk. It will boot like you’ve started the Live CD from your optical drive. Once it boots up, go through the normal directions Ubuntu provides to install that Live disk to the hard drive. Then you’re set with your virtual Ubuntu enviroment.
It’s a pretty easy system to follow to get to test and play with other operating systems on your PC. It may not be for everyone and you will need some space and a decent machine to get any performance out of the guest operating system. But for those of you interested and those of you in need of an alternate enviroment for fun or work, it is a great and free tool to use.
Cleanup Crusade: Keeping Your Windows Based PC Clean
There are tons of tools out today for cleaning up your Windows based PC, so many that it is hard to wade through the good applications and the garbage. I will run through some great applications that I use myself to keep my PC spotless. Best of all, these applications will not cost you a penny! All of the items I will talk about can be found at their developer’s website or through a site called FileHippo.com, which is a great centralized hub for free software.
The first application is Ccleaner, it is brought to you by Piriform, the creators of several good and free applications. Ccleaner is a clean up utility that users from novice to advanced can use to keep their PC clean and running like new! You can start with the Cleaner option and scan your PC for hundreds of useless files, logs, temporary items, and on and on. Once the analysis is run, the clean function allows you to remove those files.
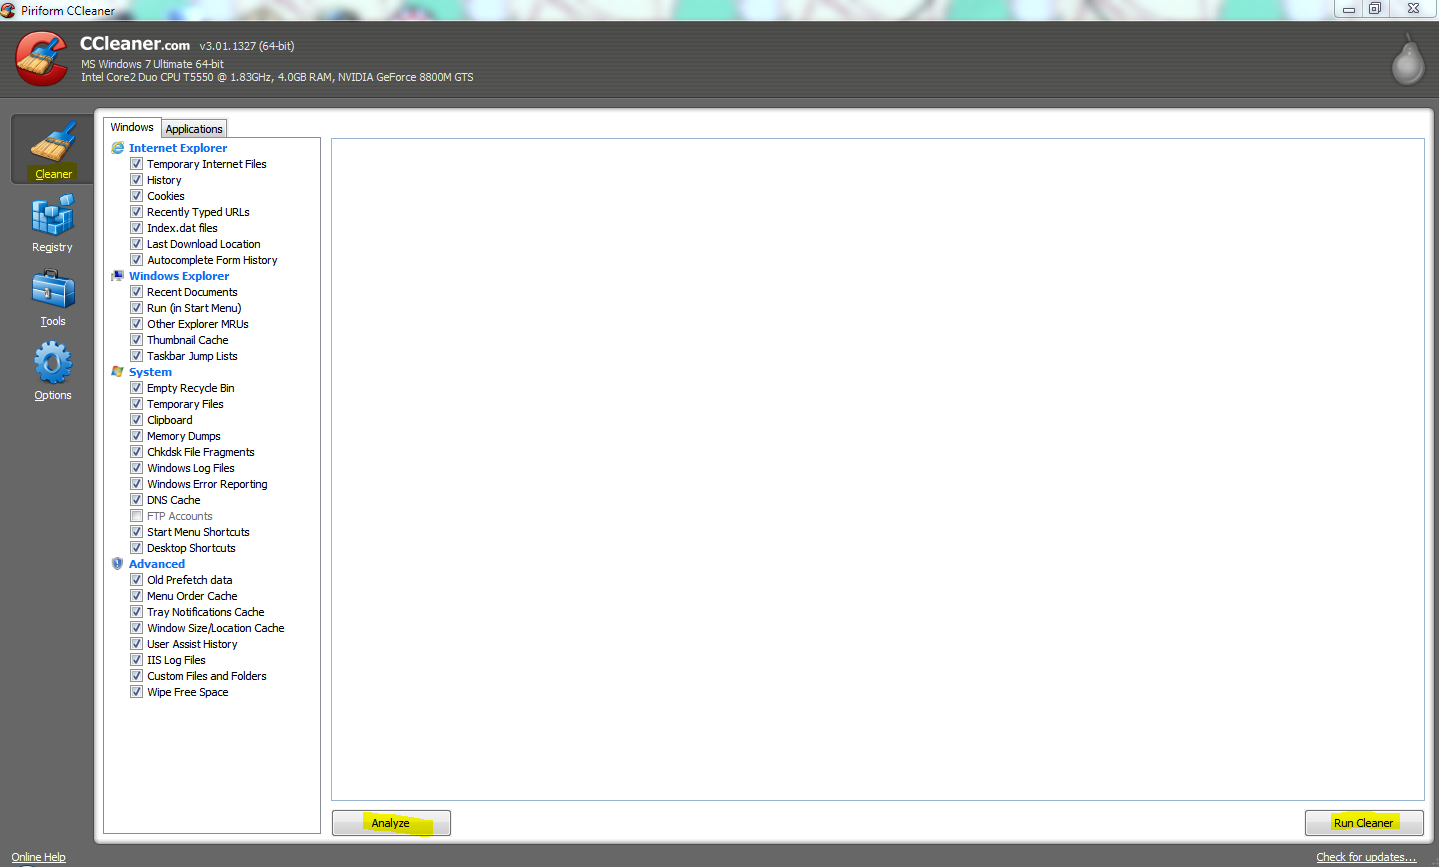
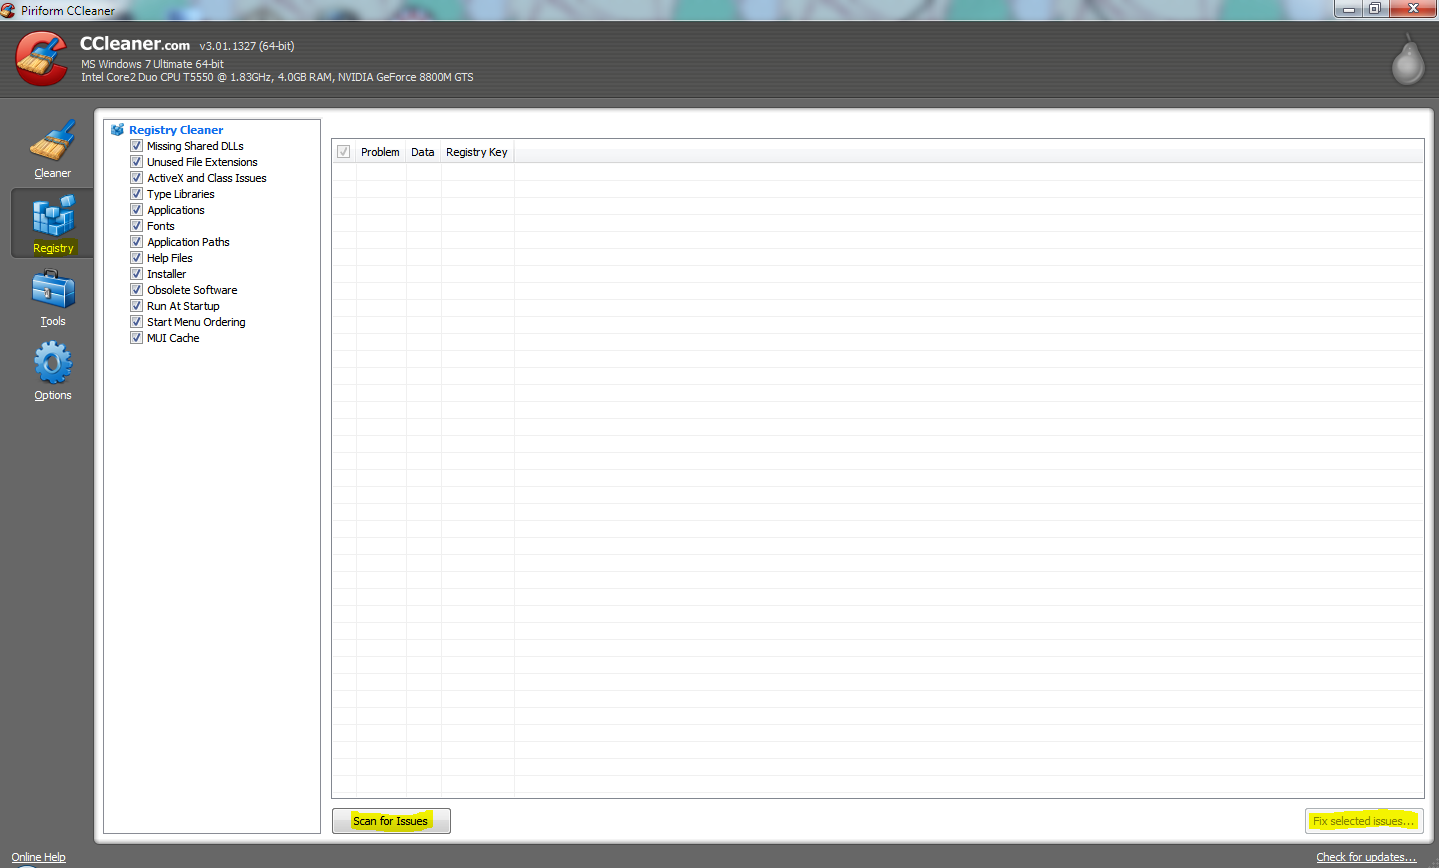
The next step in the process is the Registry Cleaner, which involves running the Analyze tool and then the Run Cleaner piece. This will run through and clean out the unused items and leftover junk in your registry.
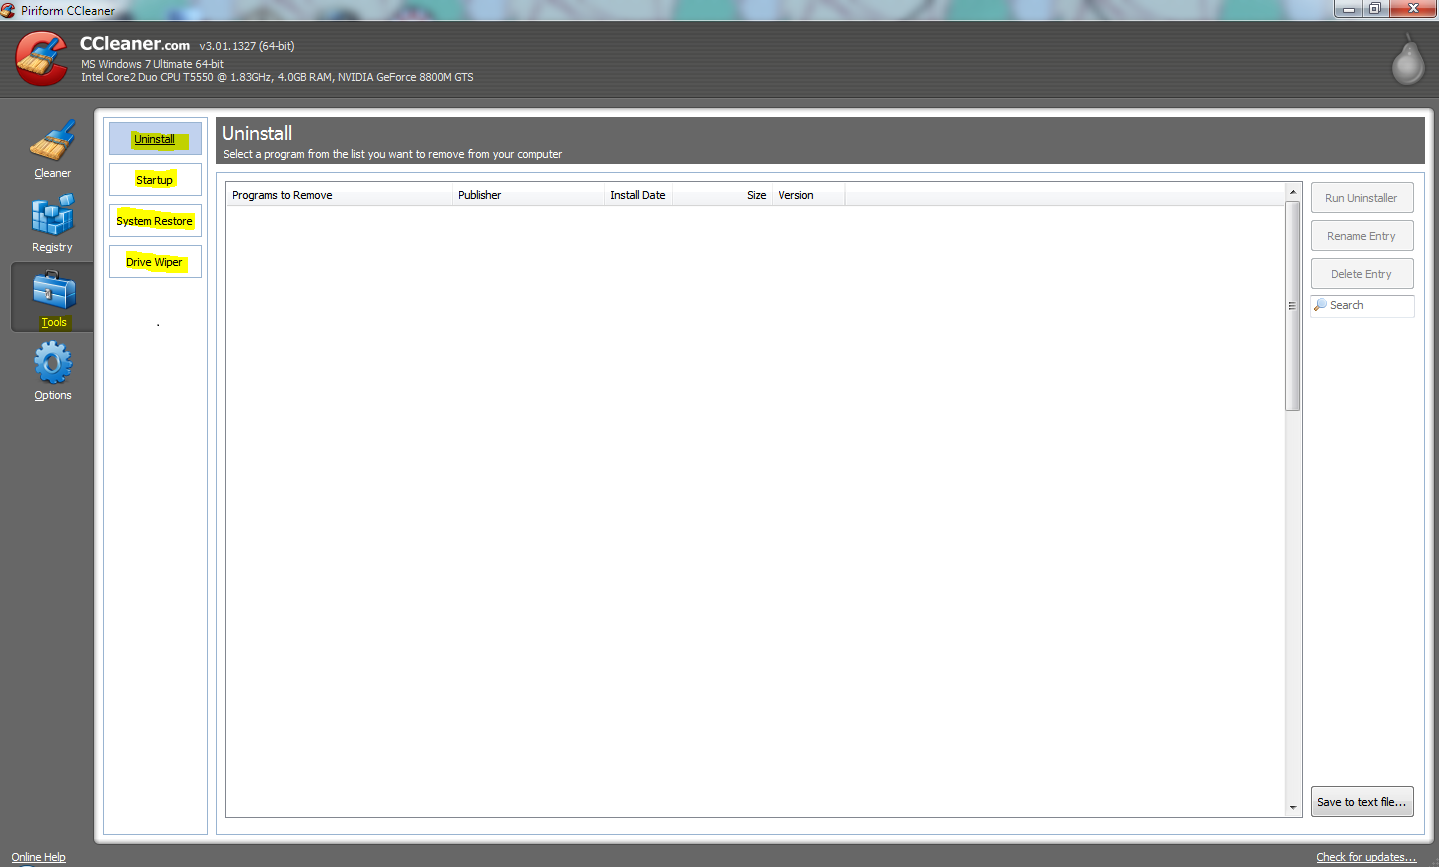
After those are done you can go through the Tools section and look at anything else you would like to use, the items included are an Uninstaller clean up, Startup items clean up, System Restore clean up, and a Drive Wiper. These are all good things more advanced users can go through to keep their PC running at a tip top pace.
Make sure with any tool to only clean and remove what you are comfortable with doing. I have been using this program for years and have never had a single problem. It is a fantastic free program and I would suggest it to anyone.
The next application is Microsoft’s Security Essentials. It is a free anti-virus software Microsofthas put out, which just so happens to put the rest of the free anti-virus applications out there to shame. It is very small, integrated into Windows, and a very light resource footprint compared to the other free anti-virus softwares out there. After you have completed a run through with Ccleaner installing and running Microsoft Security Essentials is the next step in the comprehensive clean up process.
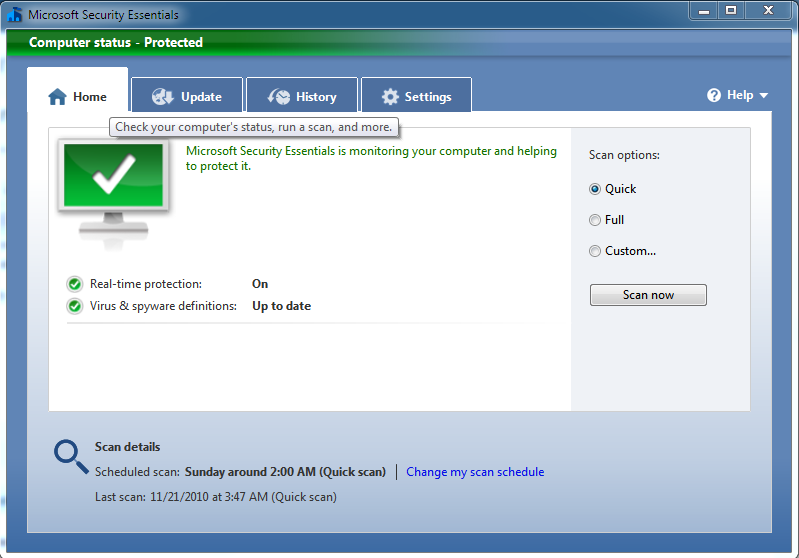
When you install the application it will set up automatic scans and do all the scheduling for you, but if you need to you can manually run a scan. The updating also takes care of itself which is great. Overall it is a fantastic piece of free software to keep your PC virus free.
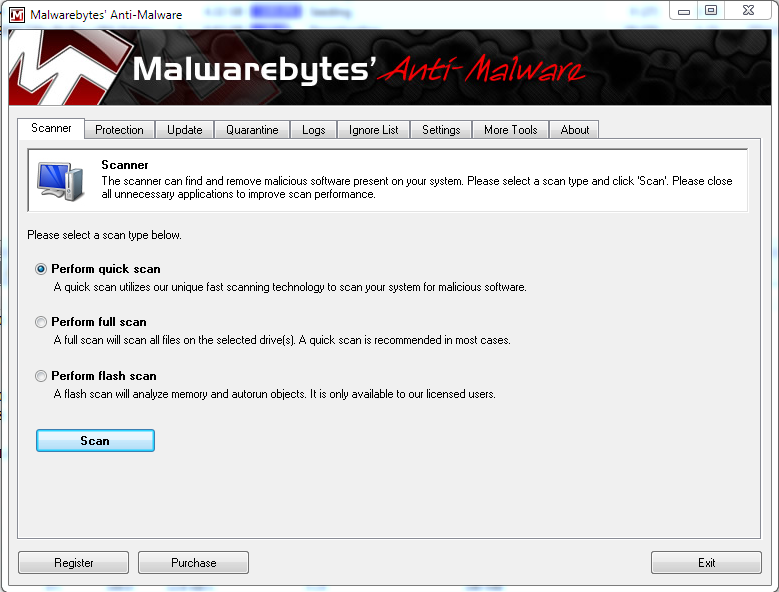
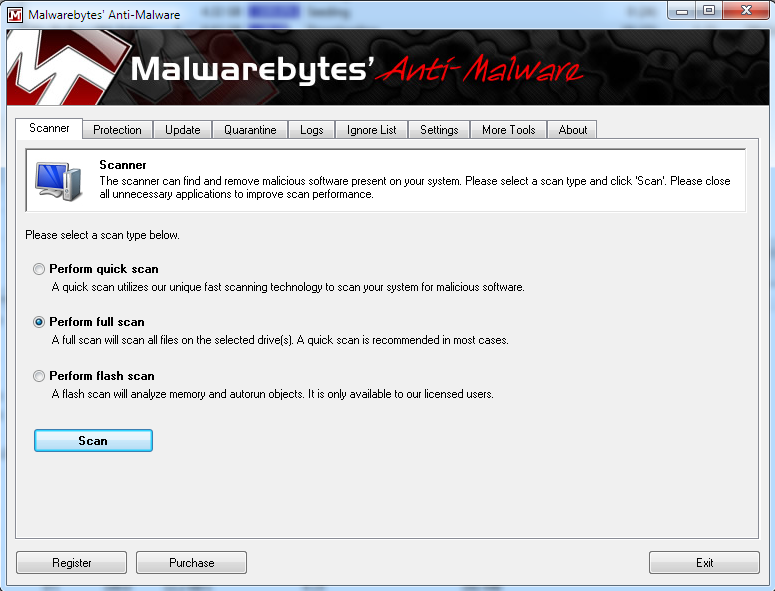
The third application is Malwarebytes Anti-Malware. It is a piece of software you should have available in the event of an infection, it has been known to catch things that other anti-virus softwares do not catch. It is not a full freeware piece of software, but the shareware installation works fine. It is one I have used several times to get rid of those nasty infections that will not go away.
Once you download the installation software and run it, launch it and click on update. Select the check for update to download the newest version of the scanner files. In the event you are not able to connect to the internet, or you have a PC so badly infected you remove it from your local network to prevent damage to other PC’s (I fully suggest you do this, you don’t want to spread the infection) there is a manual download of the update files. Follow the link on another PC and download the file, drop it on a USB thumbdrive or burn it on a CD and bring it to the infected PC. Double click and run the file and it will load the update.
Once you have your copy of Malwarebytes updated, you are going to want to run the scan. You can either choose the quick scan or the full scan. If you have gone to the trouble of reading my guide and wanting to fully clean your PC, go ahead and run a full scan. It will take a while on the full scan but in the end you will know for sure if your PC has an infection.
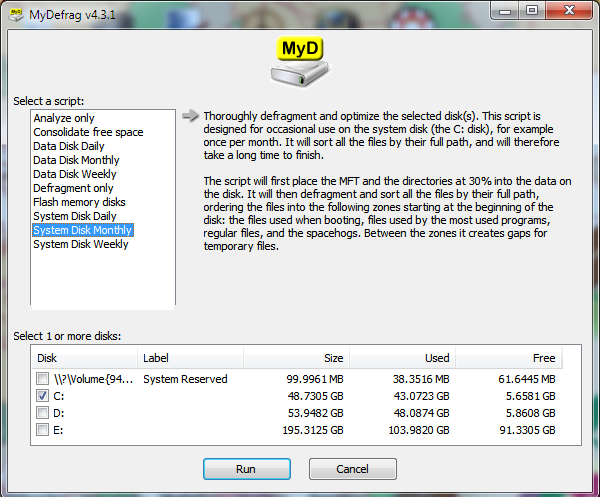
The last thing you will want to do with your cleaned up PC is to run a defrag to get data realigned on the drive after the removal of so much junk from your cleaning process. You are more than welcome to run the defrag program built into Windows, but since we are on a discussion of awesome free software, you will not want to do that. You should seriouslyconsider picking up MyDefrag(formerly JK Defrag). It is a fantastic defrag program that will also optimize your operating system drive. This is a simple program to use and it has a quick download and install.
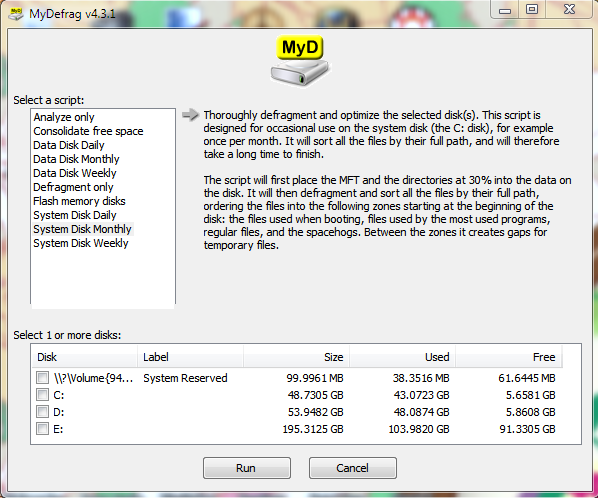
Once you load the program, if you are going to be defragging your operating system drive you will want to put the check box in your C:\. If this is your first clean up with this method, you will need to select the System Disk Monthly option. This will take a lot of time on the Monthly scan, in the future you are going to want to do a shorter scan.
Once you have the parameters set, go ahead and run the defrag. At this point you can sit back and relax, make a sandwich, do something because it will take quite a bit of time to finish. Although the screen you see when you defrag is magically hypnotic. So if you want, watch it for awhile.

Once you have finished your defrag the cleaning is over. It is not the most fun, but you will keep your PC running more smoothly and possibly a tad bit better than before. All of the programs I have listed are of extremely high quality and best of all free. There are a ton of other programs out there I did not cover, so if you know of something I should look at, please drop it in the comments.