The Making of the Liquid Dolphin
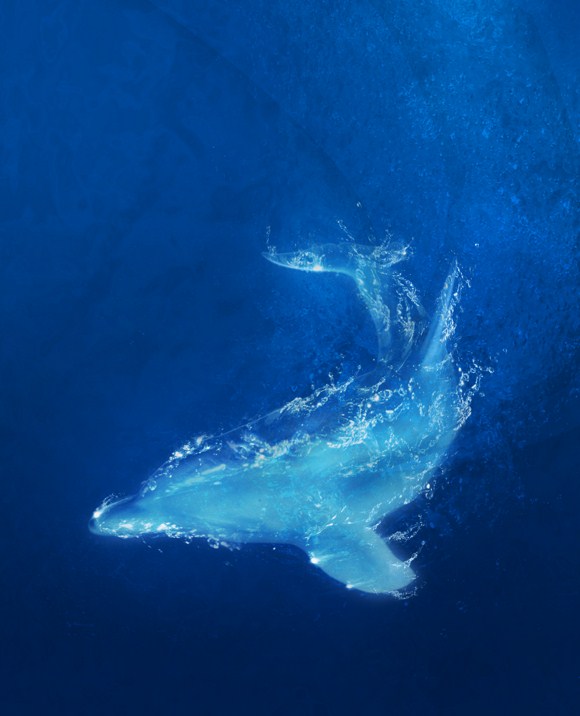
Have you ever imagined of mystical beings with bodies of crystal water? Like water but moving and in the form of animals such as dolphins, sharks and other marine animals. In this tutorial we are going to create a liquid crystal being in the form of a dolphin using Photoshop. This tutorial is useful also when attempting to recreate ice statues. And just like in the process of making the fire horse, this is going to involve several combinations of layers. This liquid effect is also an alternative when creating transparent crystal figures using other 3D rendering programs.
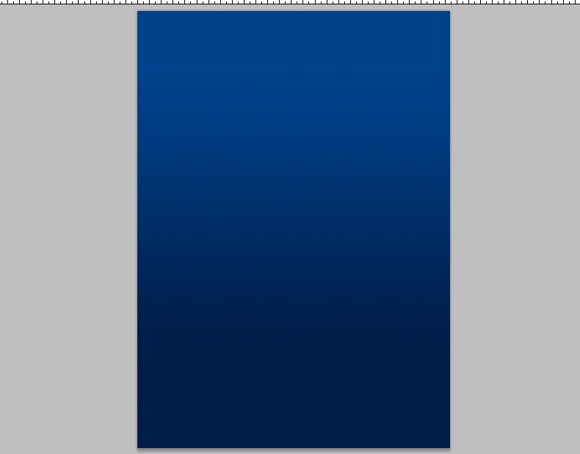
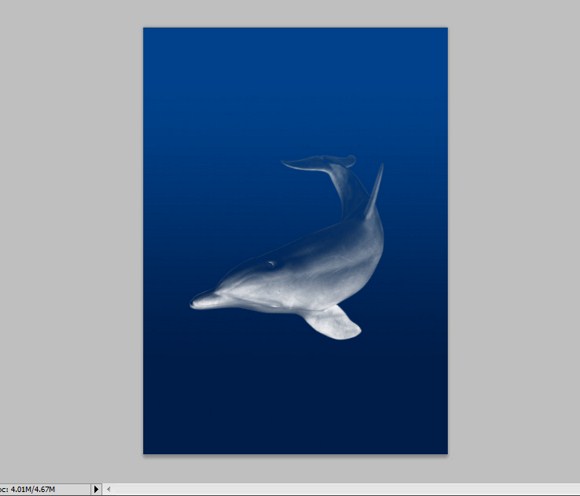
First step is to create a Photoshop document in a portrait size. An image dimension of 1000 x 1400 (height and width respectively) should be good enough.
Next fill the first layer or background with a gradient like this. You do not really need to be very accurate with the gradient colors. Just pick the colors that look like the ocean water.
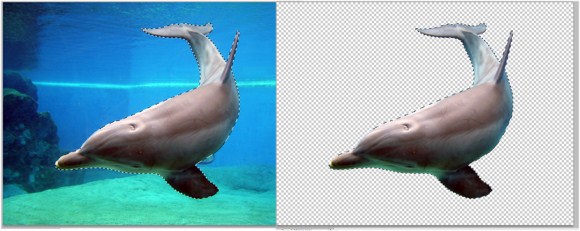
Now find a resource or stock photo of a dolphin. Prepare the main object of the project, which is the dolphin, by removing the background leaving the dolphin only.
You can use the marquee tool, the magic wand tool, or the pen tool to erase the background. You can find and read other guides on how to the selection tools to extract or cut images from a photo. For me, the best tool to use to cut the dolphin is the pen tool or the color range function if you are familiar with it.
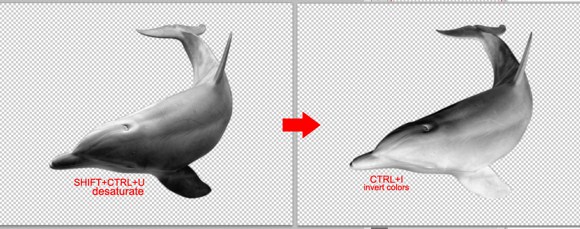
Press SHIFT+CTRL+U to DESATURATE the dolphin picture. After that, press CTRL+I to invert the colors. The result should be a negative or inverted version of a black and white photo of a dolphin.
Next, go to the Channels palette found right beside the Layers palette. PRESS and HOLD CTRL key and LEFT click on the RGB thumbnail. This will select and maintain the transparency/ opacity when you COPY it to the main document/project.
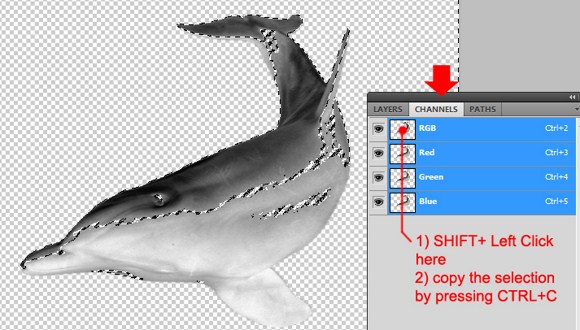
Press CTRL+C to copy the selection and paste it on the main document. Place the copied item on the suggested location. You may have to resize the dolphin if needed since it is possible that you will use a different source of the dolphin having smaller or larger image resolution.
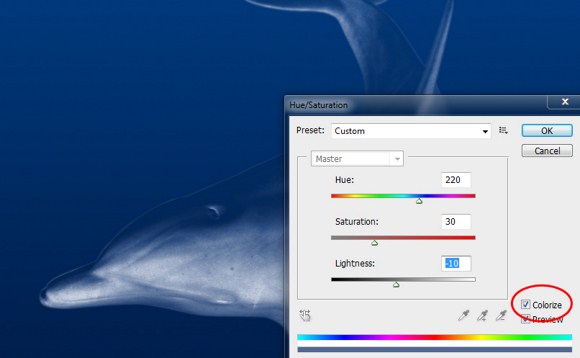
Next, go to Image > Adjustments > Hue/Saturation (CTRL+U) to colorize the dolphin. Be sure to enable the COLORIZE and try to follow the parameters given. Go to Image > adjustments > Levels and adjust to get more contrast however, this step is optional.
Change the dolphin layer blend mode to LUMINOSITY. Set the opacity to 60 percent. Duplicate this layer 3 times to get a total of 4 layers of the same object. Set the 2nd duplicate to luminosity and 100% opacity, 3rd to 30% or 25% opacity, and the last to HUE blend mode and 50% opacity.
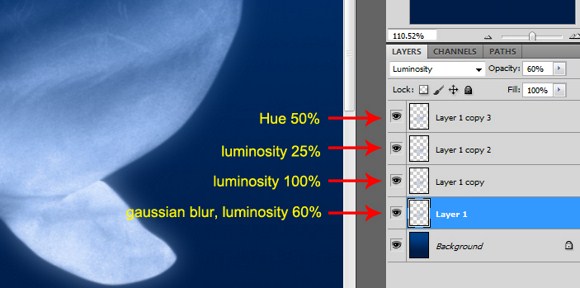
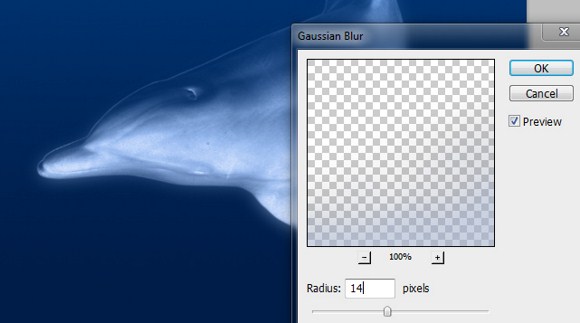
Apply Filter > Gaussian Blur on the first dolphin layer. This serves to be the glowing element of the subject. Be careful to apply blur just right.
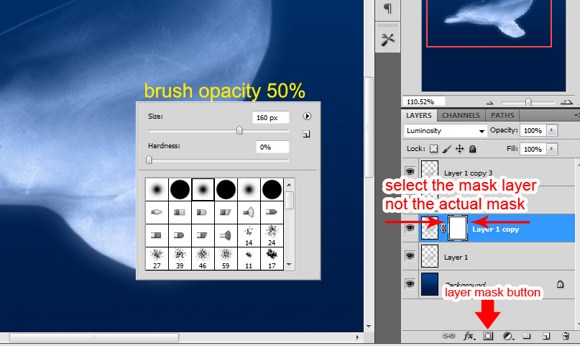
On the second layer (one with 100% opacity), create a mask layer (HIT layer mask button) Choose Pure black paint color, and paint on areas which you wish to hide or lessen visibility. Make sure you have your brush opacity at 50% at least using a soft brush.

Now before you move to the next steps search the web and download royalty free stock photos of water splashes and flowing water.
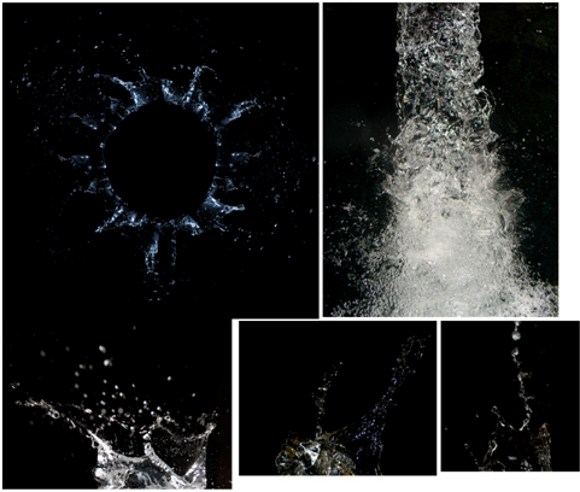
Start transferring the splashes by CUT+COPY method. Make sure you place the SPLASHES layers behind the dolphin layers. Do not forget to CHANGE the blend mode to SCREEN. Every splash you place must be DESATURATED first then COLORIZED to match the dolphin’s color.
(You can also repeat the steps where you CTRL+CLICK on the RGB layer on the CHANNELS PALETTE)
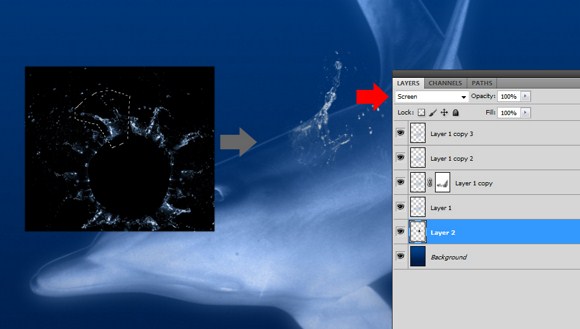
You will also need to use the warp tool to manipulate the shapes of the water splashes according to the dolphin’s body.
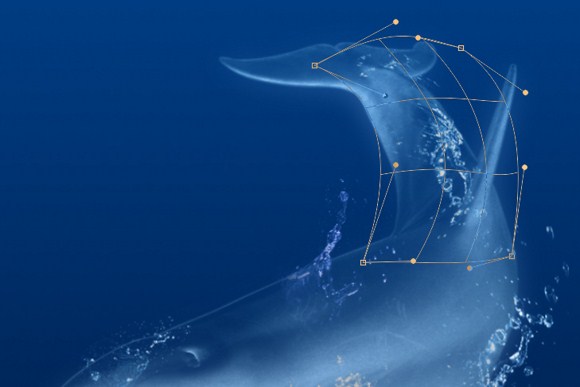
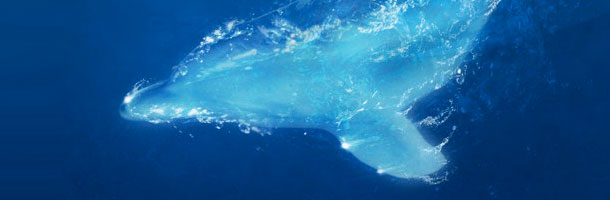
Fill the dolphin figure with splash! Use your imagination and creativity in this procedure.
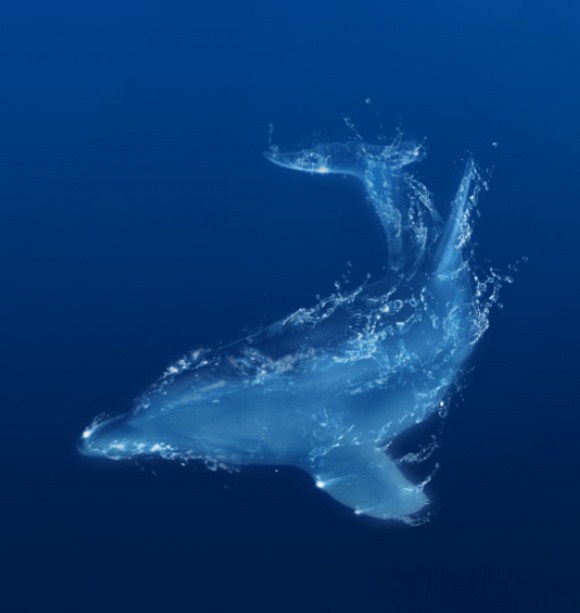
By adding some more lights and layer overlays, along with background enhancements such as bubbles, waves, and lights, we can achieve effects just like these.