Removing the Years Makeover [Photoshop Tutorial]

Aging is a natural process of life. Unfortunately, it leaves marks like wrinkles and dark spots that betray our actual age. While these marks also signify maturity and the deep well of knowledge we’ve harvested all those years, we often want to do away with them. While Photoshop cannot restore youthful vigor, it does let you remain young-looking in photos.
There are several ways to erase evidence of old age that I will go over in this tutorial.
Healing Brush
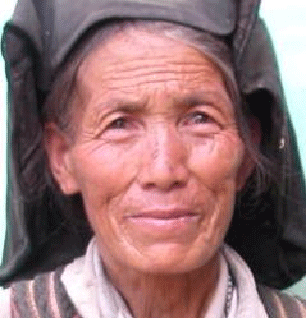
Step 1. Open the filename of the image you want to edit. This tutorial uses an image of a woman at the prime of her life.
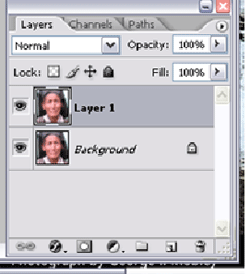
Step 2. Duplicate the layer of to protect your original image. On the bottom right corner of the screen, you’ll see the Layers palette. Click over the Background layer and press Ctrl+J. You’ll now see a new layer named ‘Layer 1’ at the top of the original image. You can rename the layer by double clicking on the words and then press enter for Windows and Return for Mac.
Step 3. On the left corner, you’ll see the Toolbox. Select the Healing Brush which may be beside the Spot Healing Brush Tool or over the Patch Tool.
Step 4. Change the diameter of the Brush on the Options bar. Slide it to an appropriate size. In the sample below, the Brush diameter is 10pixel. If you want a soft-edged brush, slide the Hardness to the left until it is set to 0%.
Step 5.Press and hold Alt for Windows or Opt for Mac, choose and then click and area where there are no visible wrinkles. This will serve as the deciding texture for your brush. As much as possible, sample an area closest to the wrinkle.
Step 6. While holding down your mouse button, drag the brush over the wrinkle area. Notice that the painted pixels differ in color from the original skin tone. When you release the mouse button, the colors will correct themselves and cover the wrinkles. Continue the painting until all the wrinkles are covered.
Step 7. On the Layer palette, reduce or decrease Opacity of the layer by sliding to the right or left. This gives the layer a more natural looking skin tone as it shows through some of the wrinkles of the original image.
While sharpening improves the clarity of the image, it also makes wrinkles more visible and prominent by increasing the contract of the adjacent pixels. It’s better to work on an original image that has not been sharpened yet so you won’t exert too much effort on excising wrinkles and fine lines. If you need to sharpen, try using Selective Sharpening.
Using the Patch Tool
The Patch tool works like the Healing Brush but with the selection tool of the Lasso.
Step 1. Choose the Patch tool. It may be hidden behind the Healing Brush. Press Alt and click the Healing Brush tool or just click and hold the mouse button over the Healing brush.
Step 2. Select a source area where there are no visible wrinkles and drag the marquee to the destination area. Release the mouse button and visible wrinkles will instantly be removed. Notice that the marquee remains on the same position. You can use the same marquee to repair another area. Remember to drag the marquee to a similarly toned part of the image.
Step 3. Retouch the subject’s face using the Patch tool until most of the wrinkles are softened, reduced, or hidden.
Step 4. To make the touch up look natural, reduce the Opacity on the Layer 1 palette.
Do not overdo the retouching of the wrinkles. Be more realistic by adjusting the Opacity to 60-70%. If the subject is an elderly man or woman, leave at least a few lines for a more natural-looking image.
Light versus Dark

The previous methods lighten the areas of the face considerably. While most methods lighten the skin tone, darkening is sometimes more appropriate.
Step 1. In the Toolbox, click the Healing Brush tool. Click on the Mode’s drop-down and select Darken.
Step 2. On the sample part, select a dark area and lighten some of the lighter parts. Use short strokes, or point and clicks to prevent uneven texture or skin tone.
Step 3. Click the Clone Stamp Tool, and slide to an appropriate brush size. You can select the Opacity hereon to 60-75% or wait until the cloning is finished.
Step 4. Take a sample of the fine line under the eyes and clone these lines to the area where you used the Healing Brush Tool. This will add a realistic and natural effect.

Step 5. If you are going to switch back to the Healing Brush Tool, remember to select Lighten on the drop-down Mode.
Dark spots removal

Age is not only distinguished by wrinkles by also dark spots as well. To remove dark or uneven spots on the subject’s face, you can do the following steps:
Step 1. Duplicate the original by pressing Ctrl+J or right-clicking on the Background layer and choosing Duplicate Layer. Another layer pop-ups on the layer palette. Rename Layer 1.
Step 2. Select the Spot Healing Brush tool. If not visible, click and hold over either on the Healing Brush, Patch Tool, or Eye Red Reduction Tool.

Step 3. Change the brush diameter on the Option bar. Choose a size that will be slightly larger than the spot you are going to remove to allow simple point and clicks removal.
Step 4. Adjust the Hardness selector to 0% for a soft-edged brush. Then select Sample to use the clear part of the image as a source of your correction data. Choose Lighten as you will reduce dark spots.
Step 5. Take a sample color from a clear spot near the dark spot to ensure even skin tone and texture.

Step 6. If you use the appropriate size of brush, you need only to click once on the dark spot. Selecting a slightly larger brush diameter affects the proximity of the dark spot and this in turn can serve as a repair spot.
We hope that you have found this tutorial useful. Remember, don’t go overboard on your editing and you can make do some great touch-ups to you photos.