Love the Look of HDR Photos? Check Out This Awesome Photoshop Tutorial
Many of us artists and photography enthusiasts dream of owning the latest DSLR camera. But high prices have left us with only those dime a dozen digital cameras.
So what can you do to get those awesome shots that are just bursting with color and life? The trick is to fake it, and Photoshop, as always, is your best friend.
This is a quick Photoshop tutorial which will teach you how to transform a regular digital still image to an HDR wonder.
Firstly, what exactly is HDR? HDR stands for High Dynamic Range imaging. This can be achieved through a series of shots with varying exposures in order to take the wide range of luminescence and colors that the eye can see but the camera cannot.
DSLR cameras are of course the staple in taking HDR photographs since you can change the exposure, lighting and colors to varying degrees. This feature is sadly not available in regular digital cameras but with a bit of Photoshop know-how, you can do wonders.
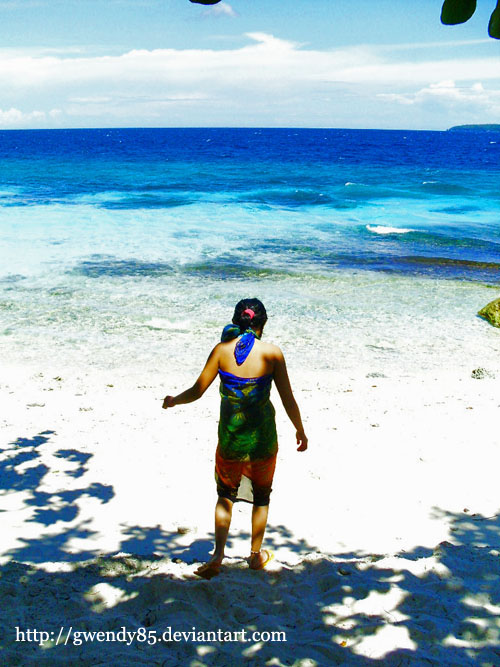
Remember that when shooting your photo through your digital camera, set it at the highest quality as possible. A bigger image resolution setting is also highly recommended. For this tutorial, we will use an image borrowed from http://gwendy85.deviantart.com . This image was shot using a Samsung digital camera, with 7 megapixel capabilities.
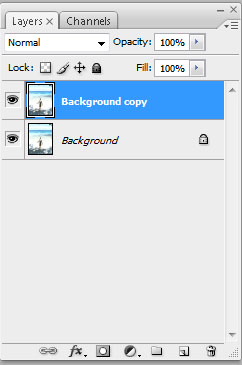
Though the image is nicely executed, the colors are quite bland. It’s time to do our Photoshop magic. Start by duplicating the background layer. Shortcut key is Ctrl+J.
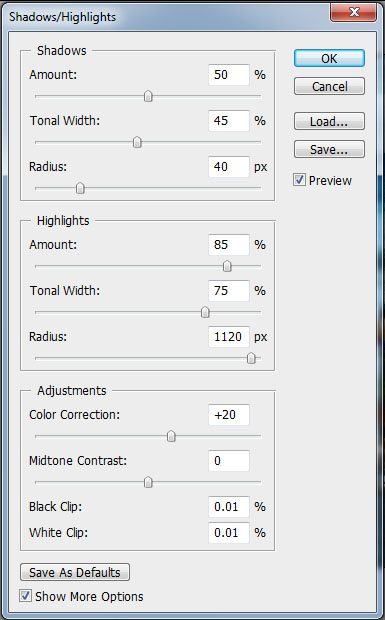
Next, go to EDIT > ADJUSTMENTS > SHADOWS/HIGHLIGHTS and set the values as follows: Shadows Amount 50%; Shadows Tonal Width 45%; Shadows Radius 40 pixels; Highlights Amount 85%; Highlights Tonal Width 75%; Highlights Radius 1120 pixels. Do not bother with the adjustments. You may refer to the image below for the values settings.
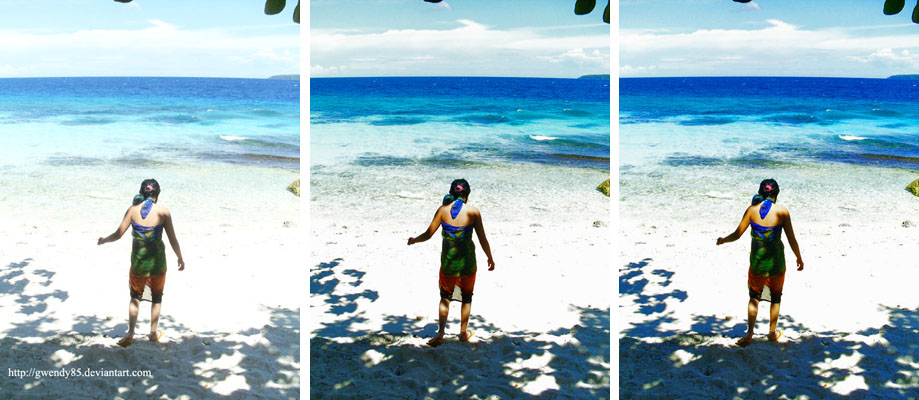
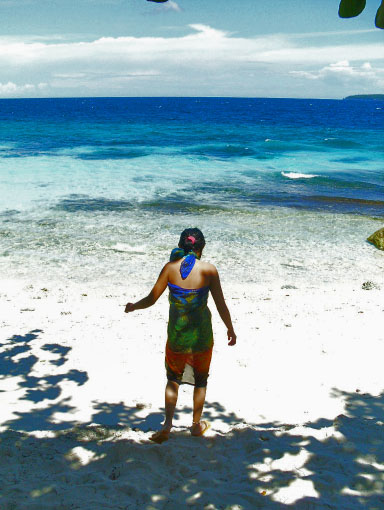
Below is a preview of the resulting image. It looks weird now, but nothing a few Photoshop tricks can’t fix.
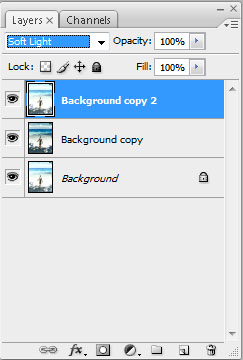
Now let’s go and fix this image. Duplicate your background layer and drag it up so it will now become the top most layer. Then, change its BLENDING OPTIONS to SOFT LIGHT. See below for reference.
By now, you should start seeing the changes but we’re not quite there yet. We need to add a bit more color, and this is where a bit of saturation and tinting comes in.
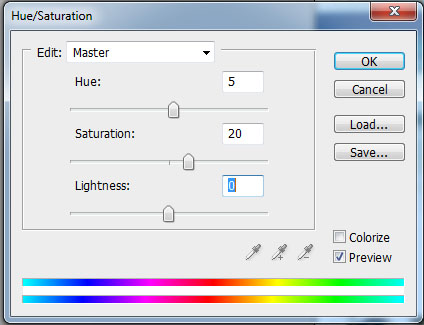
FLATTEN THE IMAGE. Then, go to EDIT > ADJUSTMENTS > HUE, SATURATION AND LIGHTNESS. Adjust it to your liking. For this image though, we will have Hue at 5 and Saturation at 20. The values here will really depend on the image you’re editing as well as your tastes and preferences.
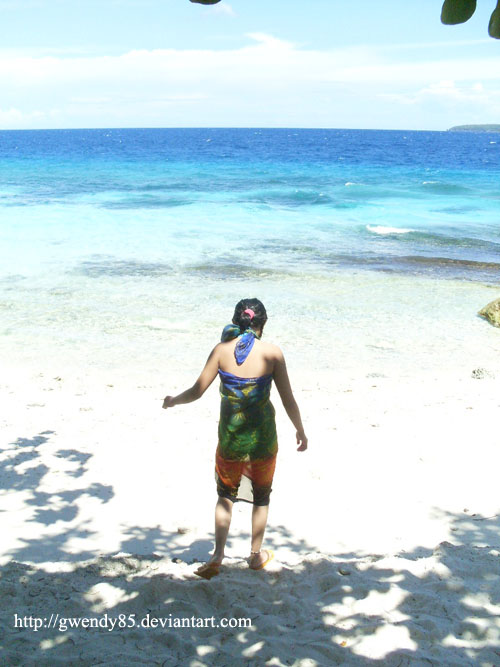
And here is the final result, along with a comparison of what it was previously. See the difference a bit of Photoshop knowledge can make? Now keep this trick in mind as you go out there and shoot to your heart’s content with your now not-so-ordinary digital camera, or find some old shots you took and give it an HDR Photoshop make over.