Improve Your Skills and Avoid Dead Ends with this Photoshop Tutorial
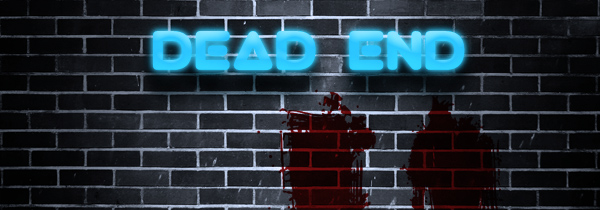
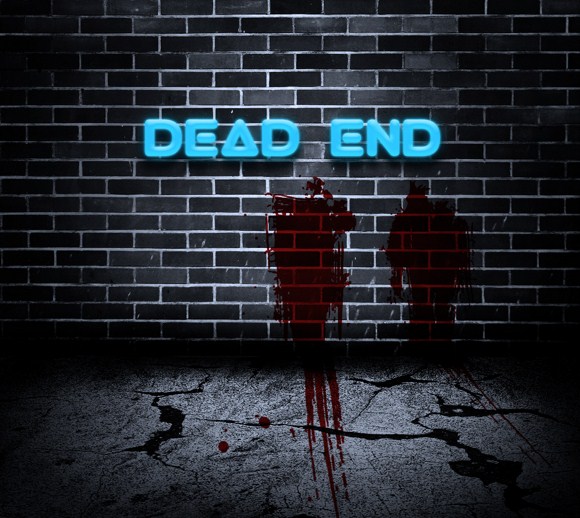
This tutorial will show you the steps to compose a dark, gloomy, and spooky background with a distinctive neon sign at a dead end. Basically, it is a composition using two techniques in Photoshop namely the Neon Lights effect and Creating a Wall Landscape. Combining these techniques can create many dark themed scenes with the help of textures, lighting, and some spooky brushes.
First, you are going to need some downloaded stuff before you can start on the project itself. The first image you are going to need is a brick wall texture. Search for good images on Google using keywords like brick, wall, and texture. I am pretty sure a large red brick wall would appear on the results.
Download secondary textures like “road textures” or “scratched textures”. Next, find some ROUNDED thick fonts form sites like “Urbanfonts” or “Font Squirrel”. For example I have to download a type face named VIRGO which is quite thick and rounded. The reason we need these rounded fonts is because we are going to imitate how a neon sign looks like.
Now, on to the project, create a document (I guess, you will have to estimate on this one), and import + place the brick wall texture just like on the image below. Leave some space blank as allowance for the ground texture.
Import the ground texture you got. This time use the Transform tool (hotkey = T) and use DISTORT or PERSPECTIVE functions (found within the transform tool) in order to reshape the ground as seen on the image below.

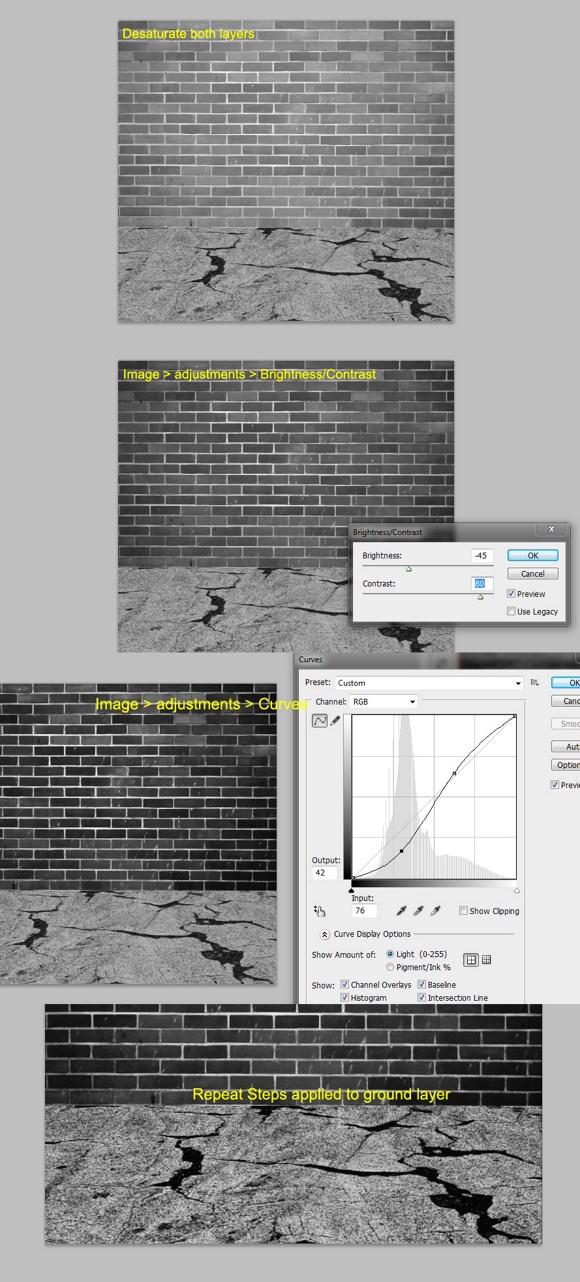
Next, DESATURATE (SHIFT+) BOTH layers. I know, there are more effective ways to do black and white images like the adjustment layers method, but for the sake of simplicity and to avoid confusion especially in the layers palette, we will do this in a NEWBIE way.
On the brick wall layer, go to Image > Adjustments > and find Brightness & Contrast. Reduce Brightness and increase Contrast significantly. Next, Image > Adjustments > Curves, and try to follow the curved figure you see in the image below. Apply to the floor/road layer the same steps with minor changes in the adjustments.
Merge the two layers, Brick wall + Ground layer. Although merging these layers is not essential, it will help to simplify things especially to those who are now getting confused on the stuff in the layers palette. The fewer the layers, the simpler it becomes to follow.
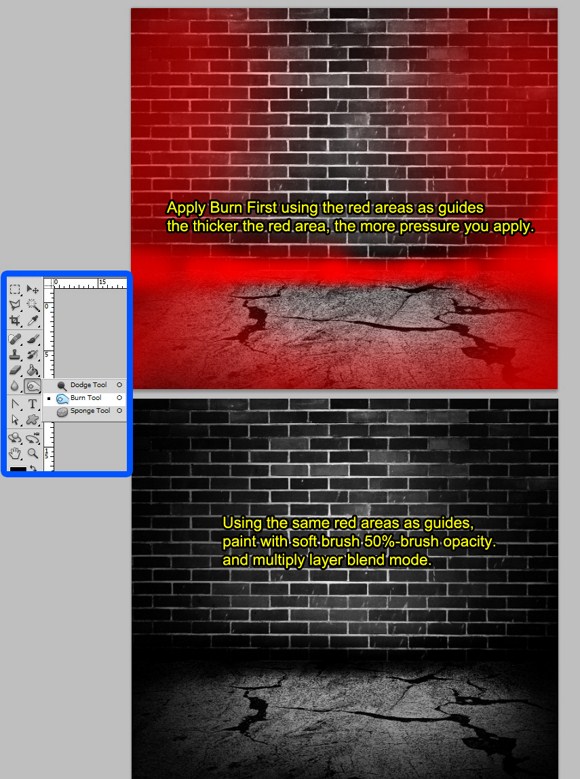
It is important you do this in order. First, Activate or click on the BURN TOOL (hotkey = O).set the burn brush opacity to 40-50 percent. Look at the image below. The RED areas are your guide where o apply the burn tool. CHANGE the RADIUS as you burn the areas. You may have apply twice or thrice on some areas to make it darker than the center area.
Create a new layer and SET it to MULTIPLY layer blend mode. Using the same “red guides”, apply a soft 50 percent opaque BLACK painted brush over the side areas. This will create the appearance of a dark alley or street dead end with light coming from the center.
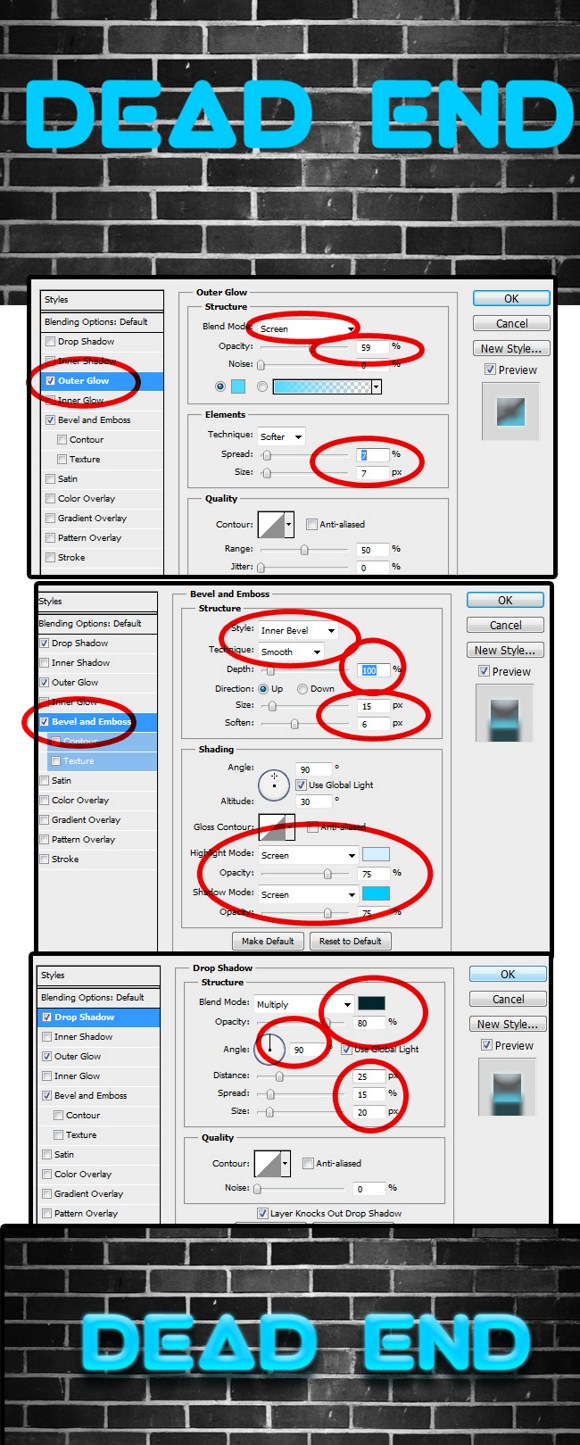
Create a text. Write anything using the VIRGO font. Or anything that is close to an actual neon light. Apply these 3 layer effects. Use following approximate settings:
OUTER GLOW:
Blend mode = screen,
Opacity = 50-60,
Color = light/sky blue,
Spread and Size = both 7 %
BEVEL & EMBOSS
Style = inner bevel,
Technique = smooth,
Direction = UP,
Size = 15 pixels,
Soften = 5-8 pixels
Highlight mode = screen, color = bluish white,
Shadow mode =screen, color = a lighter sky blue (lighter than the base color)
DROP SHADOW
Blend mode = Multiply, Color = very dark blue,
Opacity = 80 %
Distance = 25,
Spread = 15,
Size = 20
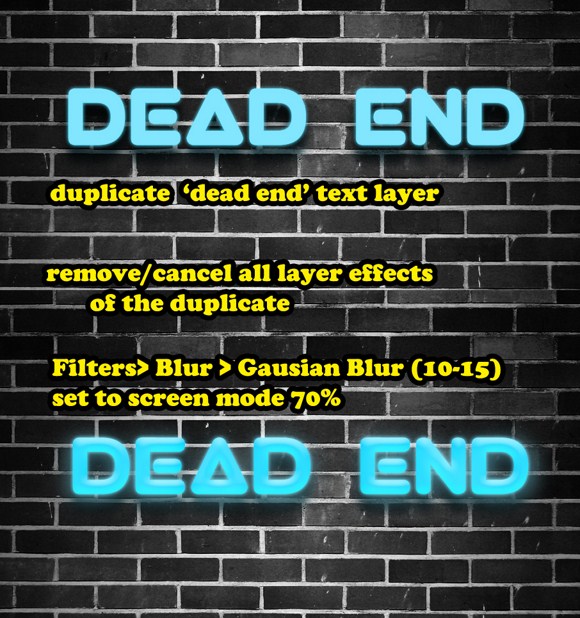
Duplicate your text layer. Disable or remove the existing layer effects. Go to Filters > Blur > Gaussian blur and apply 10-15 radius. Set this layer to screen blend mode with 50-70 percent opacity. This will give the additional glow.
Next, go to layers, Add new ADJUSTMENT LAYER (you will need this in this in the future), and choose PHOTOFILTER. Pick aqua blue as color, and set Density to about 60 percent.
And for the last cosmetic step…blood. (Am I getting too fond of putting blood to the works?) if you still have the SPLATTER brushes, load them up and set your foreground color to blood red(again). Paint anywhere on a new layer (place the layer just before the wall layer afterwards), and set the blend mode to multiply. You may use cutting and transforming techniques to help to blood look convincing.
That is it. Pleas ask questions and share your work in the comments.